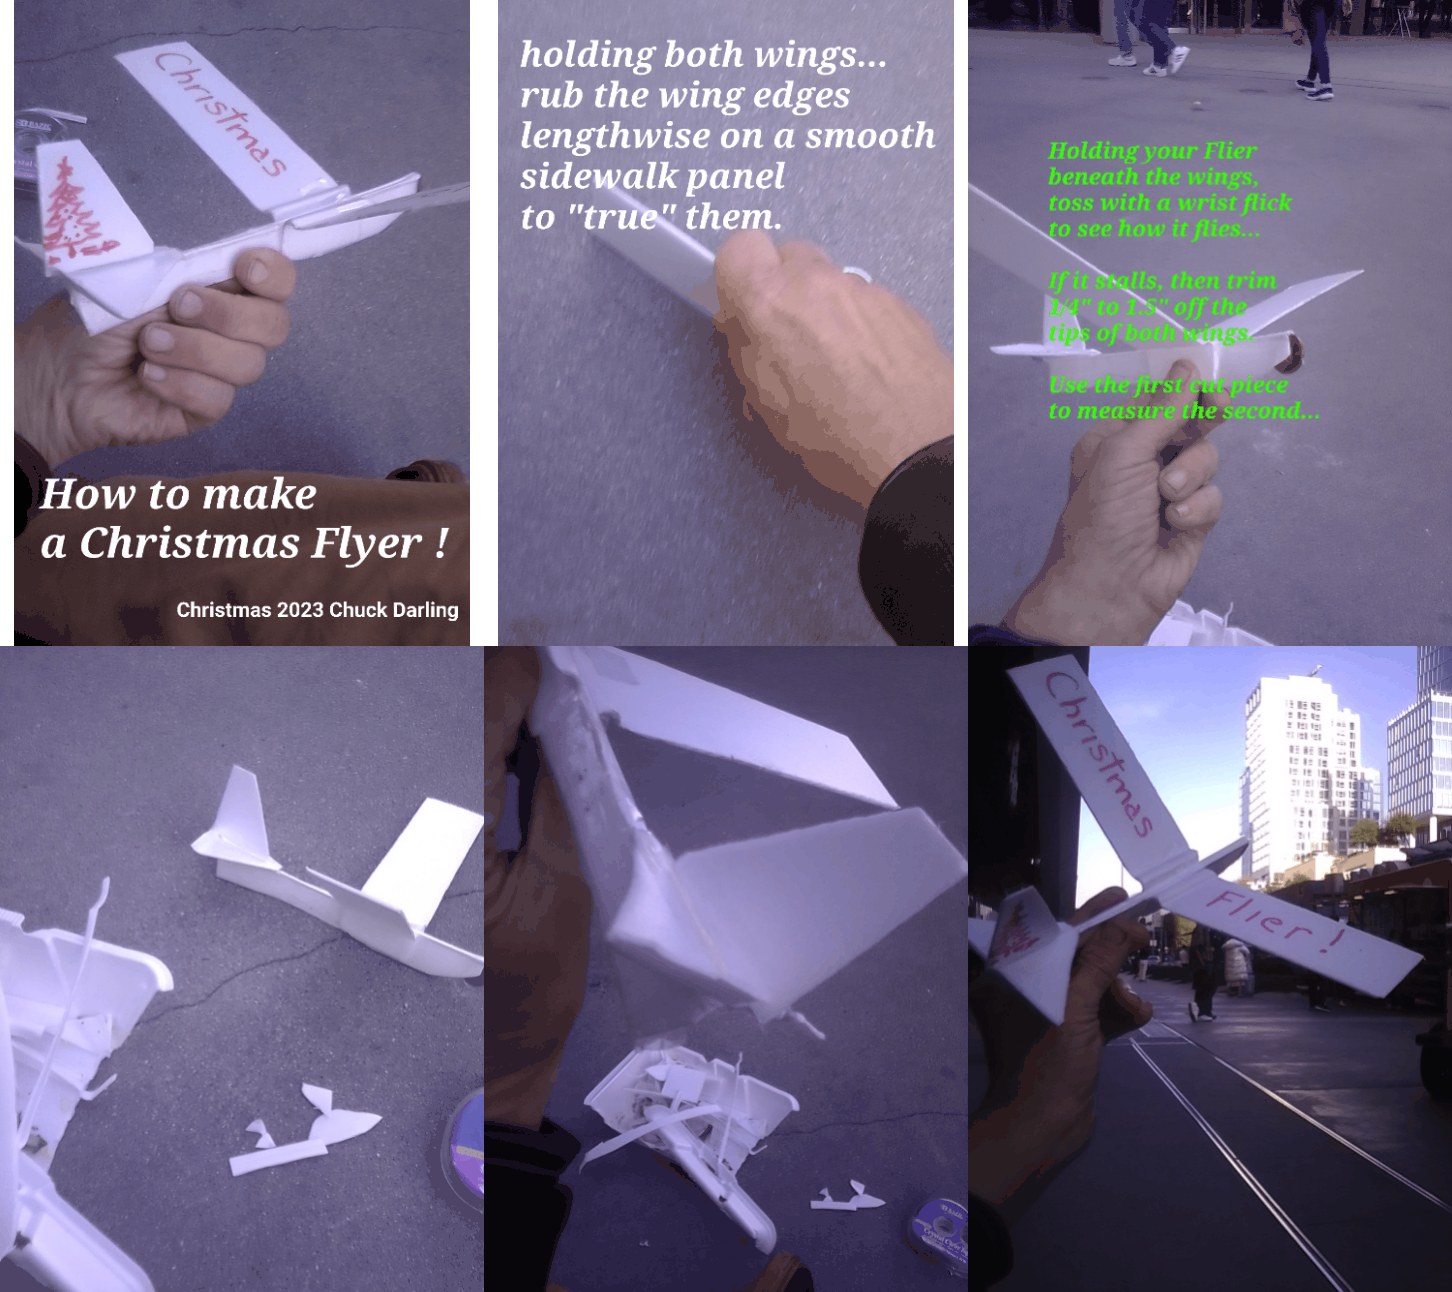
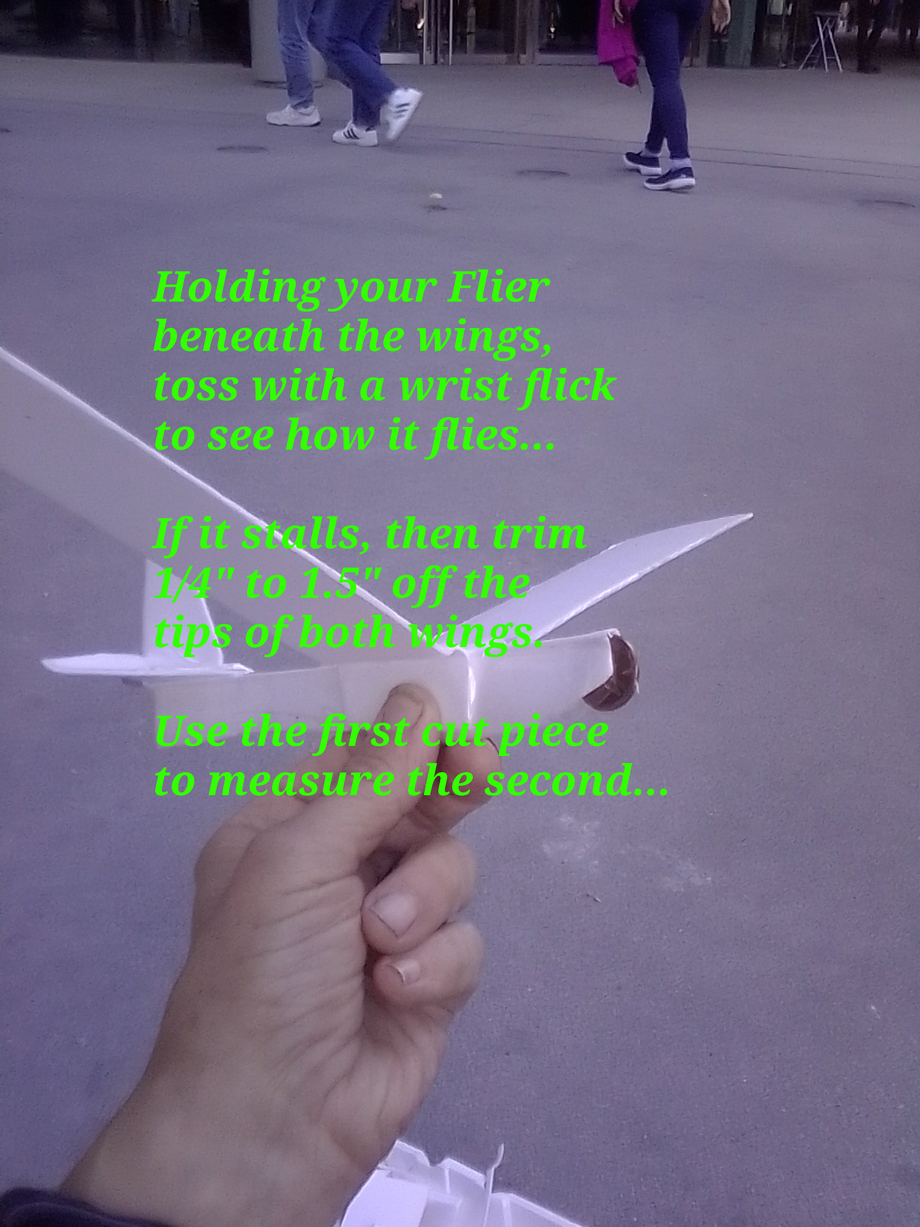
Christmas Flier !
From: Chuck
Re: Christmas Flier !
If you take your kids
to a hot-dog stand...
Carefully save the empty boxes.
The Flier that I describe
was built outdoors, on
Christmas Eve.
Materials:
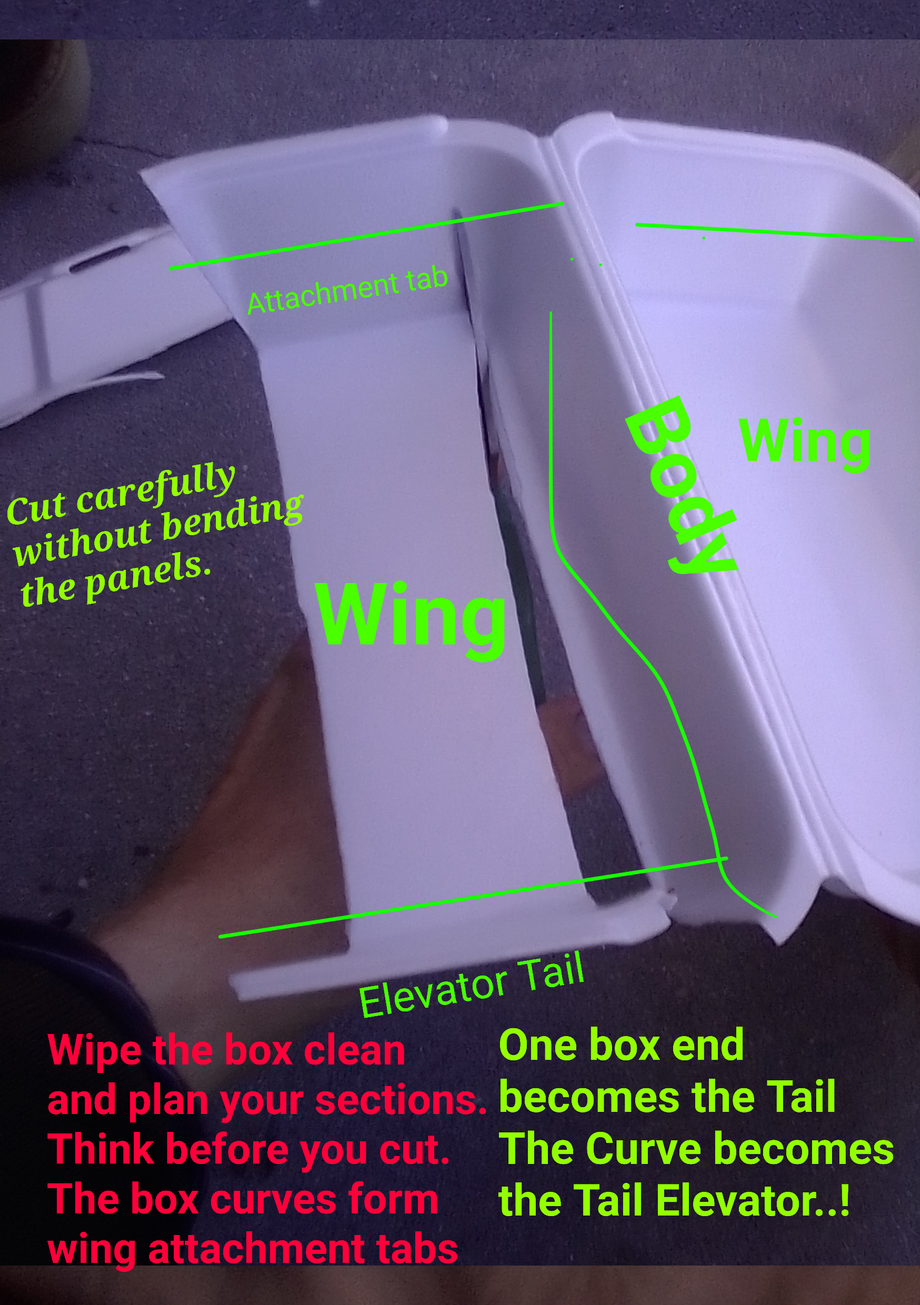
One foam food box
wiped clean.
Transparent Tape.
Scissors.
Sidewalk.
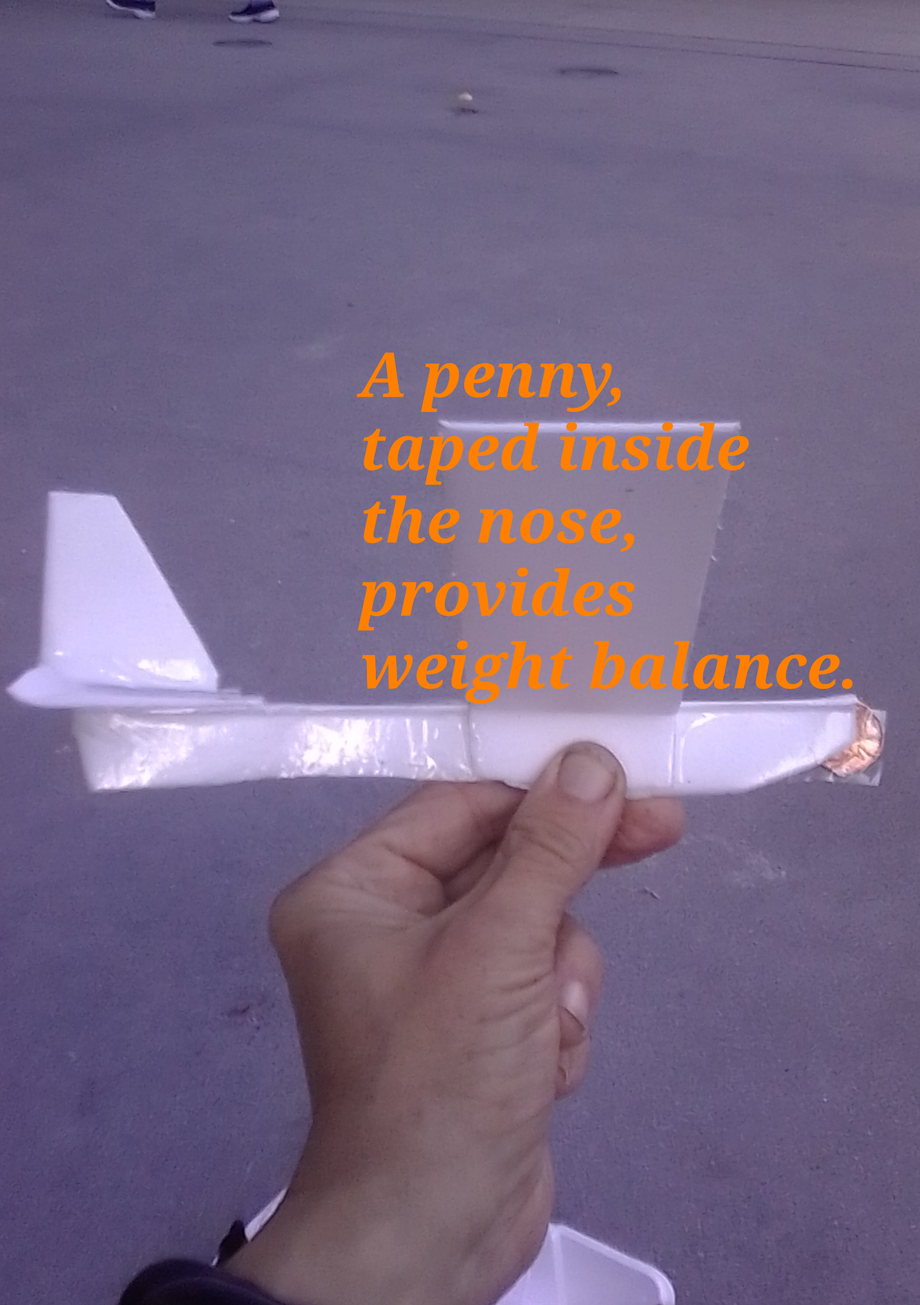
One penny.
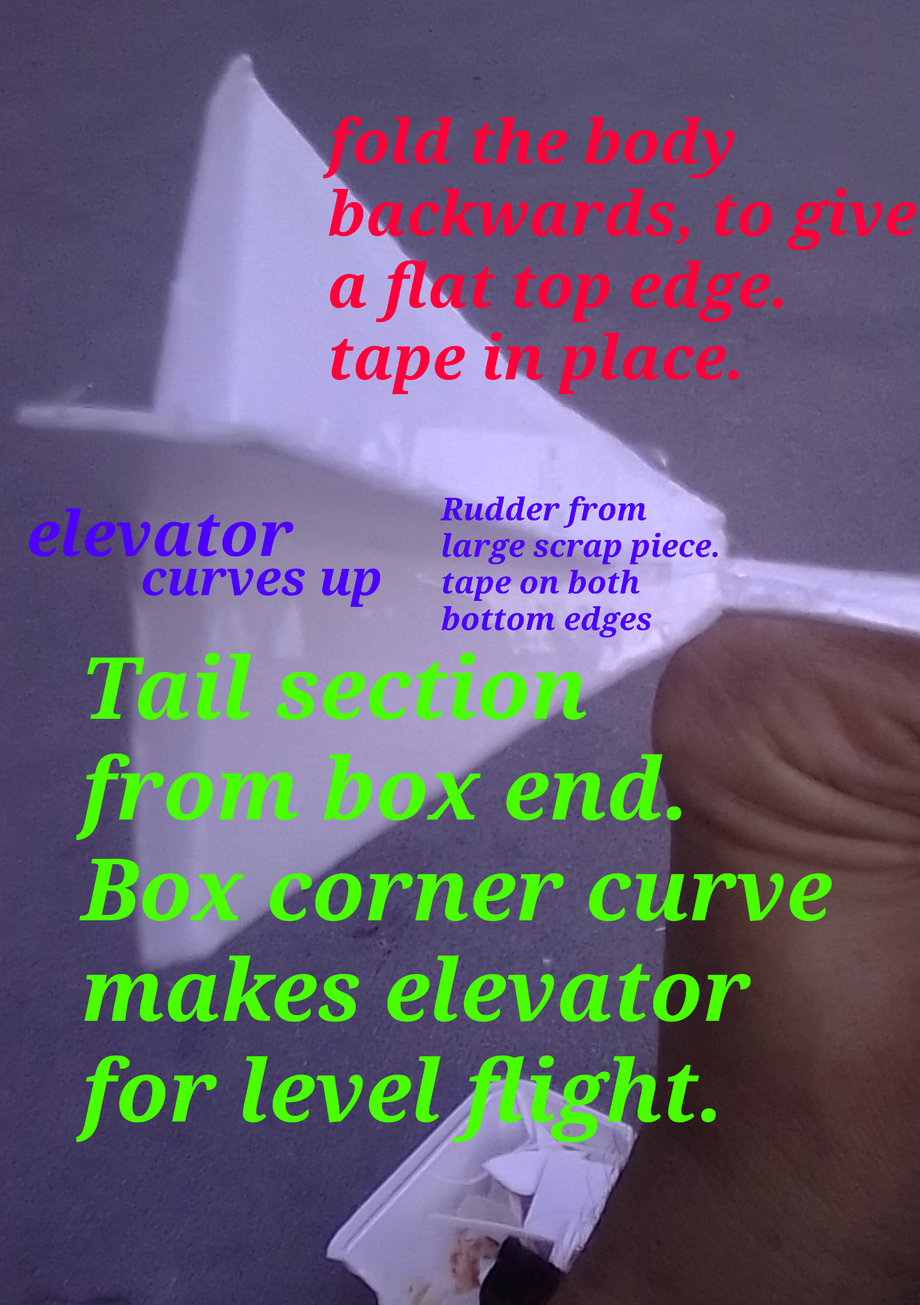
The glider, built as shown,
flew straight and level
on the first toss !
Assembly time:
20 minutes.
Cost:
One Cent.
No glue required !
Building a glider like this
one is terrific fun.
The materials are FREE !
You are RECYCLING them
in a much better way
than your municipality
ever will !
So far, I have built
six gliders on Grand Street.
This one was the best
Flier, right from the start.
If your materials vary,
consider:
I made a glider out
of the silver cardboard
of a food box,
Folding it lengthwise
and cutting it out
in ONE PIECE
like a paper doll.
(No Rudder)
(Dihedral elevator tail)
After wing curvature
adjustment, making
a wing airfoil curve,
and a tail elevator curve,
It flew, and looked GREAT !
I also made a glider
from a chopstick,
using the paper wrapper
to form the wing !
These gliders fly much
better than folded paper
Airplanes...
They're as good as
a Strato, or Stunt Flier ...
And they're FREE !!!!!
By building a few of these
for your kids...
They'll figure it out
for themselves !
Then they'll know
how to make
their own FUN !
And...
They'll pay more attention
when they're learning
about gravity, and
Aerodynamics.
Maybe becoming
Air traffic controllers
or Pilots.
Or Space Suit Designers.
Merry Christmas !
Chuck
PS. Fly in a wide open area
without a lot of trees and
rooftops.
For a long flight, throw upwards
at a 45 degree angle as if
throwing a baseball.
Throw it hard !
If you tip the plane
at an angle, with one wing higher
than the other, the plane
will circle.
You can play with the rudder
and elevator... causing
turns and loops.
Bend carefully,
or build another one !
Here's a nice video
on building a
and a
channel you into
using
LASER CUT PARTS
or
a certain brand of glue.
You can use ANY glue
or, no glue at all, as I've
demonstrated.
As for laser-cut parts...
who needs them
if you have to trim them
out with an Xacto, anyway ?
Just remember:
The lighter the better ...
The stiffer the better...
Foam is naturally
waterproof...
Balsa is not.
Dew covered lawns
in the spring and fall
will soon dampen
and WARP balsa wings.
Carry some paper towels
with you to dry your wings
under these conditions.
Markers are good for
decoration, because they're
weightless...
Paint is HEAVY.
Modelers used to use
high solvent Butyrate
paints called "dopes"
which made a very thin
lightweight paint.
You don't want
8 year olds playing
with those pro colorants.
Foam, tape,
scissors and markers...
that's safe for kids.
North Pacific used an
ingenious extruded plastic
clip, that both held the wings
at a dihedral angle,
and allowed the wings
to be slid forwards and
backwards to optimize
flight balance.
Because there were two
wings held by the clip,
a wing would pop off
in the event of a collision,
Instead of shattering
like the other brands.
They were very clever
and attuned to the needs
of young fliers.
You could probably
3-D print the clips
now ...
But 8 year olds couldn't.
*****
[Beans Tues, 12-25-2023 Time : 11:59a]
[ This page built with JPICedar v. j102123a Tues, 12-25-2023 Time : 12:00p ]

