Prerequisites
-------------
The things you will need to set up LiteHTTP are:
A VPS or Webhosting w/ databases
7Zip, WinRAR, or any archive management tool
Time
I will be using a VPS running CentOS as a demonstration.
Step 1 - Setting up the panel
-----------------------------
To start, download the file linked below.
Once you have the file downloaded, go ahead and extract it wherever you like. Next, we want to upload our panel files to our host. Since I am using a VPS, I'm using a tool called WinSCP. This tool is similar to FileZilla, which can also be used. Fill in the information to your VPS like so:
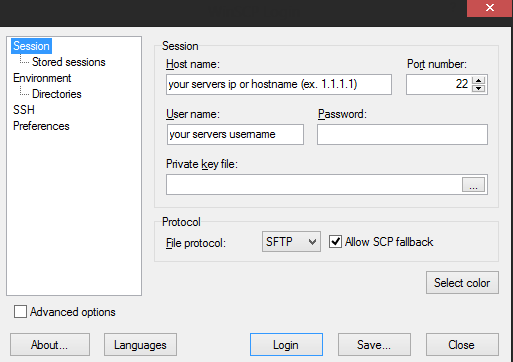
Once you've filled everything out, you can save the login for future use, or just click the Login button. Once you are signed in, you will probably see something similar to this:

The next step is to upload our files. This is as easy as opening the LiteHTTP-master folder, and dragging the Panel directory into the WinSCP window. The files will begin to copy onto your server.
While the files are transferring, we can install a few things we're going to need on our VPS. Go ahead and open Putty and enter the information to your VPS:
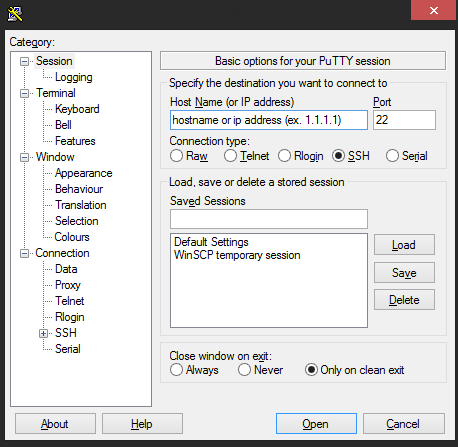
Here we can execute commands to manage our server. We will use this to install: PHP, MySQL, Apache, and phpMyAdmin (database management).
To install software on our CentOS VPS, we are going to use the yum install command. First we'll install Apache by typing this command:
`yum install httpd`
It should look like this in your console:
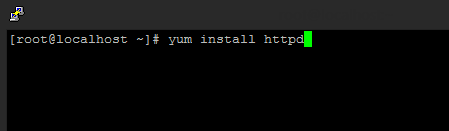
Once it's typed in, hit enter. Yum will do it's pre-install operations, and sooner or later you'll be asked a question to respond with yes or no (y/n), type `y` and hit enter.
Once yum has completed, Apache is now installed. To make sure Apache starts up if your server is shut down or rebooted, type this command:
`chkconfig httpd on`
Now we are going to do the same thing for MySQL by typing this command:
`yum install mysql mysql-server`
Follow the same steps as we did with Apache but changing httpd to mysqld, and MySQL will then be installed. This does not mean that MySQL is ready yet, as we still need to setup our root login. To do this, start off by typing:
`service mysqld start`
This will start the MySQL server so that we can use it to manage databases. To setup the root login, type the following, but changing `thisismypassword` to your root password:
`mysqladmin -u root password 'thisismypassword'`
After hitting enter, the password for the MySQL root user should now be what you set it to. To test this, type the following command and hit enter:
`mysql -u root -p`
It will ask you for your password, which is the password you supplied in the last step. If you see a screen like this, your password is set:
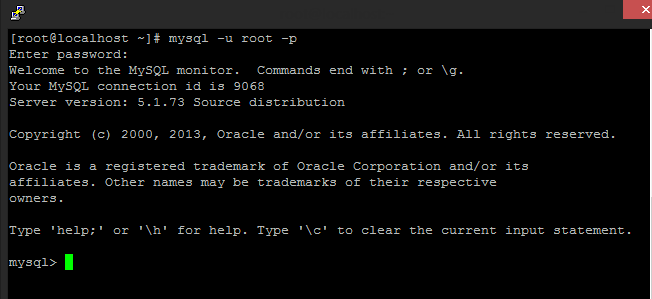
You can exit MySQL by using CTRL+C. Once you are out of mysql, we're now going to install PHP by typing:
`yum install php php-devel php-cli php-pdo php-mysql`
This will install PHP for Apache. Now, installing phpMyAdmin is a little more tedious since we can't install it with yum (yet). In order to install phpMyAdmin with yum, we need to add what is called a `repository` that contains the files we need. To do this, type the following:
`rpm -ivh http://ftp.jaist.ac.jp/pub/Linux/Fedora/epel/6/i386/epel-release-6-8.noarch.rpm`
If this command asks you yes or no, type y and hit enter. Now that we have the repository installed, we can then install phpMyAdmin by typing:
`yum install phpMyAdmin`
Please note that this command is case-sensitive (the M and A). Once phpMyAdmin is installed, we need to edit Apache's configuration before we can access phpMyAdmin from our webbrowser. To do this, use WinSCP or your transferring client and go to the root directory `/` by double-clicking the `...` directory at the top:

Next, double-click on `etc`, and once inside etc, find the `httpd` directory and double-click it as well. Once you are inside the httpd directory, double-click on `conf.d`. Once you are here, you should see 3 files:
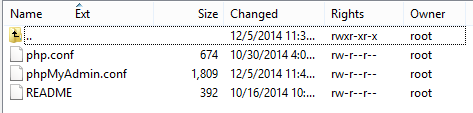
We need to edit `phpMyAdmin.conf` so that we can access phpMyAdmin from our browser. To edit the file, right-click it and click on Edit. Once the file is open in the editor, we need to add a line inside this block:
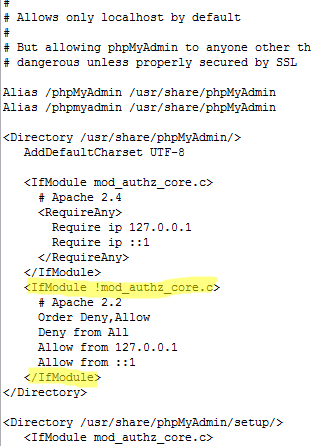
After the line `Allow from 127.0.0.1`, make a new line and enter:
`Allow from YOUR_IPADDRESS`
Where YOUR_IPADDRESS is your IP address (can be found from http://ipcow.com).
Once you've added this line, save and close the file. Now return to your console and type this command
`service httpd start`
If everything is configured and installed correctly, you will see:

The warning about the hostname can be ignored, as it's not going to cause any problems. Now that Apache is running, we can access our phpMyAdmin from the browser. To do so, open a new tab or new window, and type:
`yourserversip/phpMyAdmin` or `http://mydomain.com/phpMyAdmin`
Once you've opened this URL, you'll see a page like this:
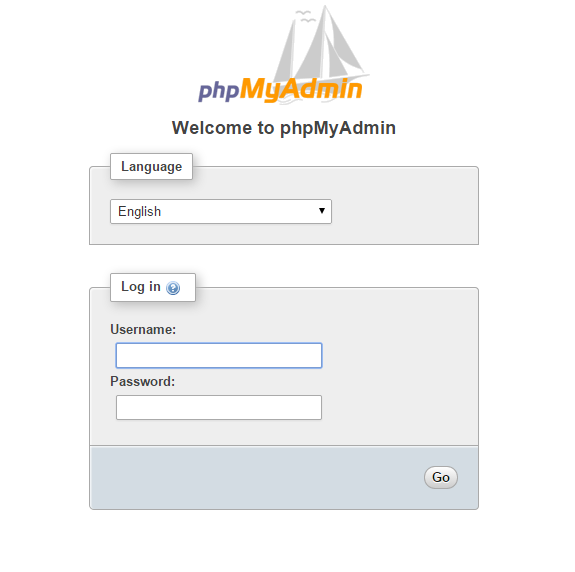
The username is `root` and the password is the one you specified earlier in the MySQL setup. Once logged in, it'll look something like this (maybe a different theme):
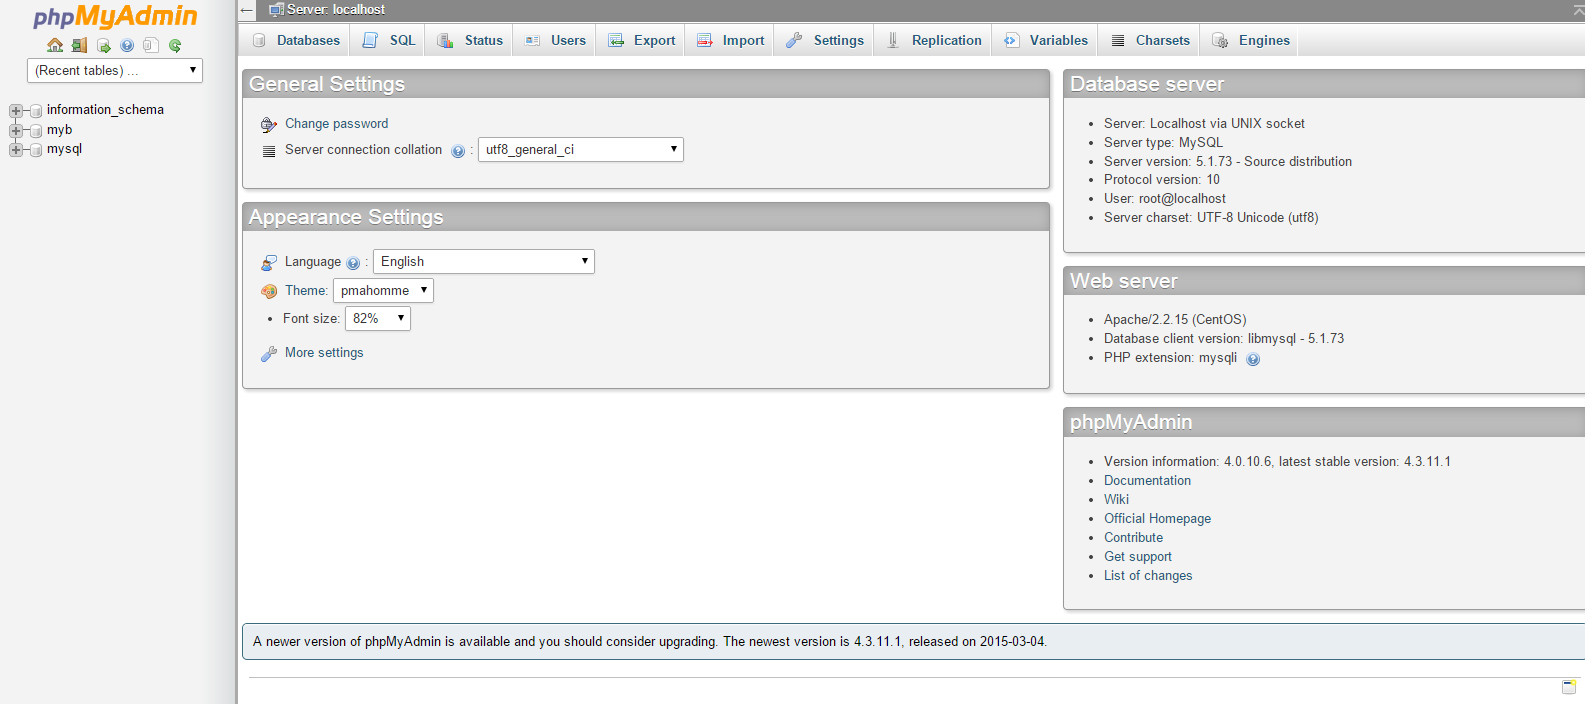
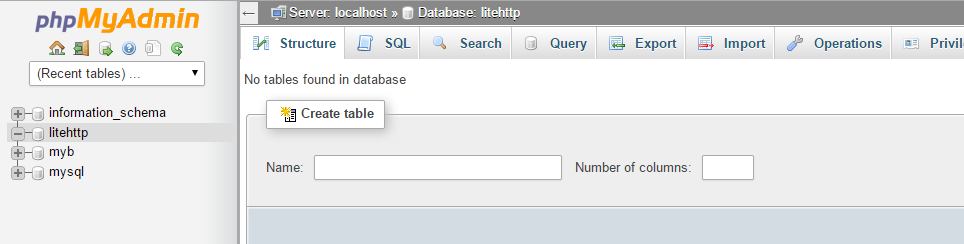
To create our database, click on `Databases` in the navigation menu, and fill in a name for your database and click Create.
Now that we have created a database, we can upload our SQL file, which is located in the Panel folder from the extracted archive. To upload it, click on your newly created database, and you'll see a screen similar to this:
Click on the `Import` button in the navigation menu. Once there, you'll want to click on `Choose File` and find the SQL file on your computer. Once you've found it, double-click it and then click `Go` at the bottom of the phpMyAdmin screen. phpMyAdmin will then import all the required tables for the bot.
At this point, we're done with phpMyAdmin and it can be closed. Now that we have set up our database, we can move our previously uploaded `Panel` directory to Apache's directory. To get back to the `root` of your server, keep double-clicking the 3 dots at the top of the current directory. Once at the root, double-click on `root`. There should be a `Panel` directory that we want to move.
To move this directory, right-click on it, and click on `Move To`, and in this box, type in:
`/var/www/html/`
This will move the Panel directory to Apache's root directory. Next, we'll want to move to the same directory. Go back to the root of your server, double-click on `var` -> `www` -> `html`.
Now that we're here, enter the Panel directory, then enter `inc`, and right-click on `config.php`. Once the editor is open, there are a few settings we need to change:

The `dbhost` stays the same if you are using a VPS, otherwise this is the host of your MySQL server.
The `dbuser` is `root` if you are using a VPS for this tutorial.
The `dbpass` is the password you set in the MySQL setup.
The `dbname` is the database name you chose, in my case `litehttp`.
At this point, we don't yet have a `encryption/decryption key` yet, because this is generated by the builder. This will come in a later step, but for now, save and close the file. This will make it so we can sign into our panel. To do so, open a new tab or new window, and type in:
`serverip/Panel/login/` or `http://mydomain.com/Panel/login/`
This will bring up the login page. Currently, the username and password are: `admin`
Once signed in, you'll be at the dashboard of the panel. It is highly recommended that you change the password. To change your password, click on your username in the top-right of the screen, and click on `Edit Account`.
Once there, type in the current password, then your new password, and click on `Change Password`. Once your password is changed, it will take effect the next time you attempt to sign in.
We are now done with the panel setup!
Step 2 - Building a bin
-----------------------
To build a bin, navigate to the extracted folder and enter the Builder directory. When you open the builder, it will look like this:
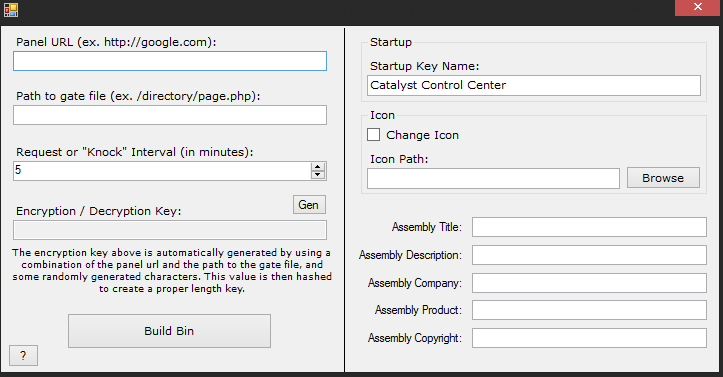
Now, before we get into building the bin, there needs to be some clarification about the settings.
Panel URL - This would be the main URL of your server, whether it be your domain or the IP. For example, if your domain is google.com, in the Panel URL box it should look like this: `http://google.com` or `http://your_servers_ip`
Path to gate file - This is the path to your gate file. This would be everything that comes after the domain or IP address. If you followed this tutorial exactly, you should enter: `/Panel/page.php`
Request Interval - This is how often your bot checks in with the panel, in minutes. If you change this value, you need to update the setting in the panel by clicking on the `Settings` option in the panel
Encryption / Decryption Key - This is the encryption key that is generated for your bin. Don't be alarmed if it has been changing while you're typing your other settings, this is to ensure a true random key. After building your bin, the panel's config.php file needs to be updated with this key in the `$deckey` variable
Startup Key Name - This can be changed or left blank, but this is the name of the registry key to ensure the bot starts back up if the computer is shut down or restarted
Change Icon - You can optionally change the output bin's icon if you wish to do so.
Assembly Info - This is the infomation that is displayed when you hover over the file, or view it's "details" under the file's properties
Now that we've clarified the settings, we can build the bin. Once the bin is built, copy the encryption key and update the panel with this key before closing the window.
Now that the bin has been built, we can test it. I do not suggest testing it on your own system, unless you absolutely know what you are doing. It's a safer option to run the file in a Virtual Machine to see if it connects to the panel.
Notes
-----
The output bin is most likely not going to be FUD, and will probably require a crypter. If you aren't sure if the crypter you are using is compatible with the bot, it's best to ask the seller/developer of the crypter.
This bot is intended for research purposes only! I am against using this for malicious purposes on systems you do not own or do not have permission to be on. Keep in mind that I am not held responsible for your actions, and you bear the full responsibility.