Shocks and springs play a crucial role in ensuring a smooth, comfortable, and safe ride. They absorb the impact from bumps and potholes, preventing excessive bouncing and maintaining stability. Over time, these components can wear out, leading to a rough and potentially dangerous driving experience. Replacing them at the appropriate intervals is essential for maintaining your vehicle's performance and longevity.
Signs It's Time for a Replacement
There are several telltale signs that your shocks and springs need attention. Excessive bouncing or nose-diving after hitting a bump, a bouncy or swaying sensation when turning or braking, and uneven tire wear can all indicate worn-out components. Observing these signs and addressing the issue promptly can prevent further damage and ensure your safety on the road.
Selecting the Right Parts
Choosing the correct replacement shocks and springs is crucial. Original Equipment Manufacturer (OEM) parts are designed specifically for your vehicle and ensure a perfect fit and optimal performance. However, if you're looking for upgraded handling or a different ride quality, aftermarket performance shocks and springs can provide a customized solution.
The Replacement Process
<Step 1: Prepare for the Job> Before diving into the replacement process, ensure you have the necessary tools, a safe workspace, and the appropriate replacement parts. Consult your vehicle's service manual or seek professional guidance if you're unsure about any aspect of the procedure.
<Step 2: Safely Lift and Support the Vehicle> Proper vehicle support is essential for safety and access. Use jack stands or a lift to raise the vehicle to a comfortable working height, ensuring it's securely supported according to the manufacturer's recommendations.
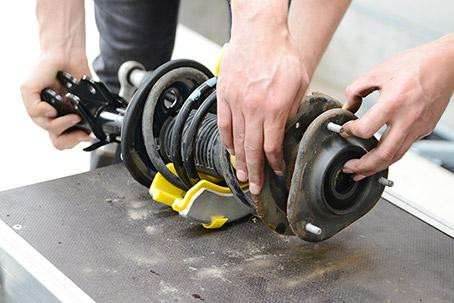
<Step 3: Remove the Old Components> Carefully follow the disassembly instructions for your specific vehicle, removing the old shocks and springs. Take note of any special tools or techniques required, and be cautious when handling compressed springs.
<Step 4: Install the New Parts> With the old components removed, it's time to install the new shocks and springs. Ensure proper alignment and follow any torque specifications precisely. Double-check that all components are installed correctly before lowering the vehicle.
<Step 5: Road Test and Adjust> After completing the installation, take your vehicle for a test drive to assess the ride quality and handling. If necessary, make any final adjustments to ensure optimal performance.
By following these steps and addressing any issues with your vehicle's shocks and springs, you'll enjoy a smoother, safer, and more comfortable driving experience.
Maintenance and Prevention
Regular inspections and preventive maintenance can help extend the life of your shocks and springs. Adhering to the manufacturer's recommended service intervals and addressing any issues promptly can save you from costly repairs down the line.
Replacing shocks and suspension springs may seem daunting, but with the right guidance and a bit of patience, it's a task that can be accomplished by most DIY enthusiasts. Trust your instincts, take your time, and enjoy the newfound smoothness and control your vehicle will offer after a successful replacement.