
Introduction
The analytics services delivered by Snowflake occur through cloud infrastructure to process extensive data quantities and develop robust data sharing functionalities. Multiple businesses choose Snowflake due to its capabilities of providing a seamless user interface together with infrastructure that lacks servers and independent storage and computing resources.
Through its step-by-step instructions the guide instructs new users to create their account as users view interface navigation elements and load data samples into Snowflake.
The guide provides all necessary steps to deploy Snowflake successfully before beginning utilization.
Step 1: Sign Up for a Free Snowflake Trial
Snowflake offers a free 30-day trial that includes $400 in usage credits. You can use this trial to explore all of Snowflake’s core features.
How to Sign Up:
-
Choose your cloud provider (AWS, Azure, or GCP).
-
Select a cloud region close to your location.
-
Enter your email address, company name, and create a password.
-
Accept the terms and click "Get Started."
Once your account is created, you'll receive a confirmation email with a login link.
Step 2: Log In and Explore the Web Interface
After verifying your email, you’ll be redirected to the Snowflake Web UI.
Interface Overview:
-
Worksheet: Where you write SQL queries.
-
Databases: View and manage all your databases and schemas.
-
Warehouses: Control compute resources (used to run queries).
-
Shares: View or share datasets with other Snowflake users.
-
History: Track your recent queries and job executions.
Tip: You can also access Snowflake via the command-line tool snowsql or through APIs, but the web UI is perfect for beginners.
Step 3: Create Your First Warehouse
A warehouse in Snowflake is a compute resource. Without one, you can't run queries or load data.
Steps to Create a Warehouse:
-
Go to the "Warehouses" tab.
-
Click "Create".
-
Name your warehouse (e.g., demo_warehouse).
-
Choose a size (start with X-Small to use fewer credits).
-
Set auto-suspend to 5 minutes (to avoid wasting credits).
-
Click "Create Warehouse."
Congratulations, your compute engine is ready!
Step 4: Create a Database and Schema
Now that your warehouse is set up, you’ll need a place to store data.
Create a Database:
-
Go to the "Databases" tab.
-
Click "Create".
-
Name your database (e.g., demo_db).
-
Click "Finish".
By default, Snowflake will create a schema named PUBLIC inside your new database.
Step 5: Create a Table and Load Sample Data
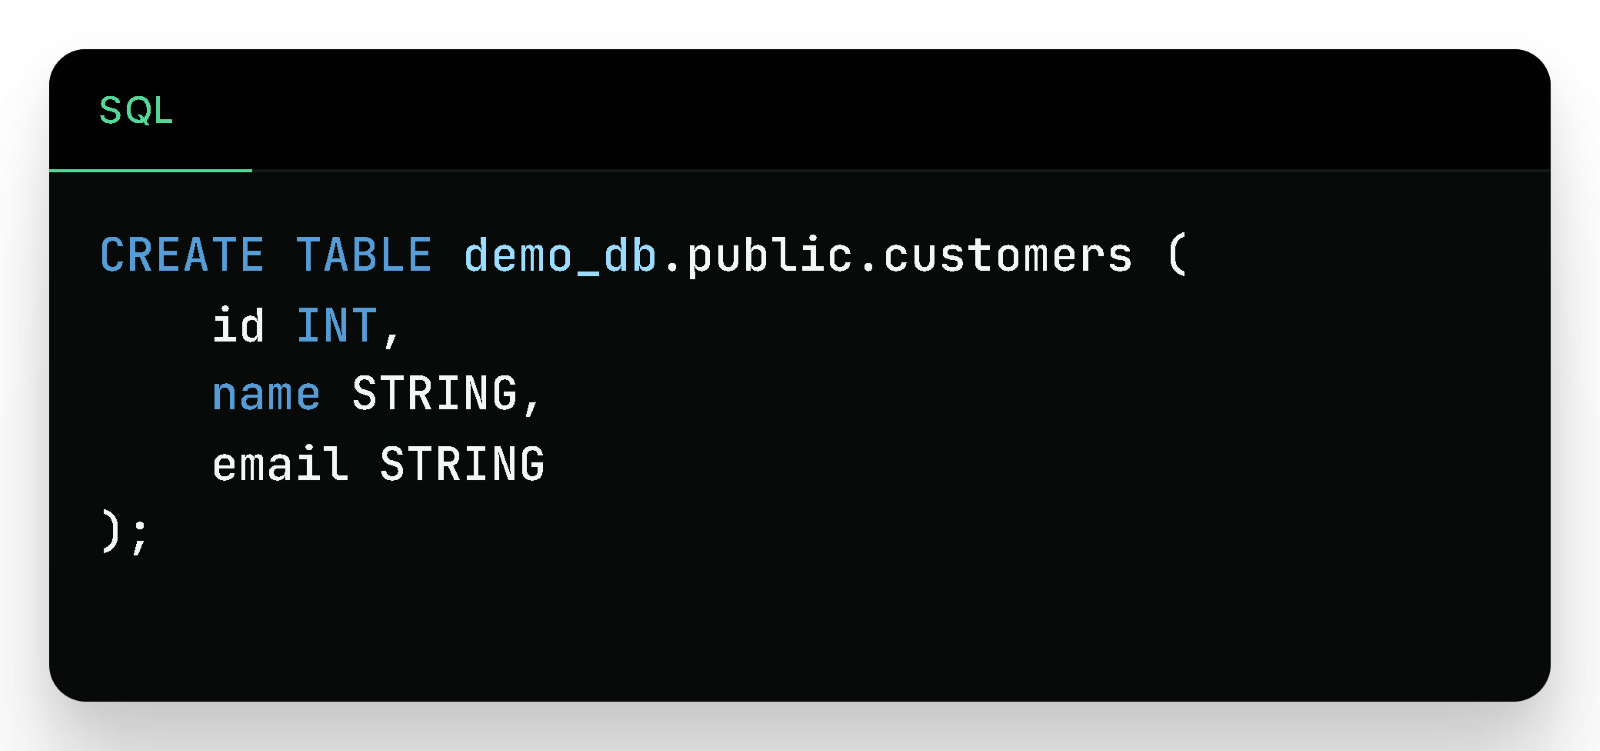
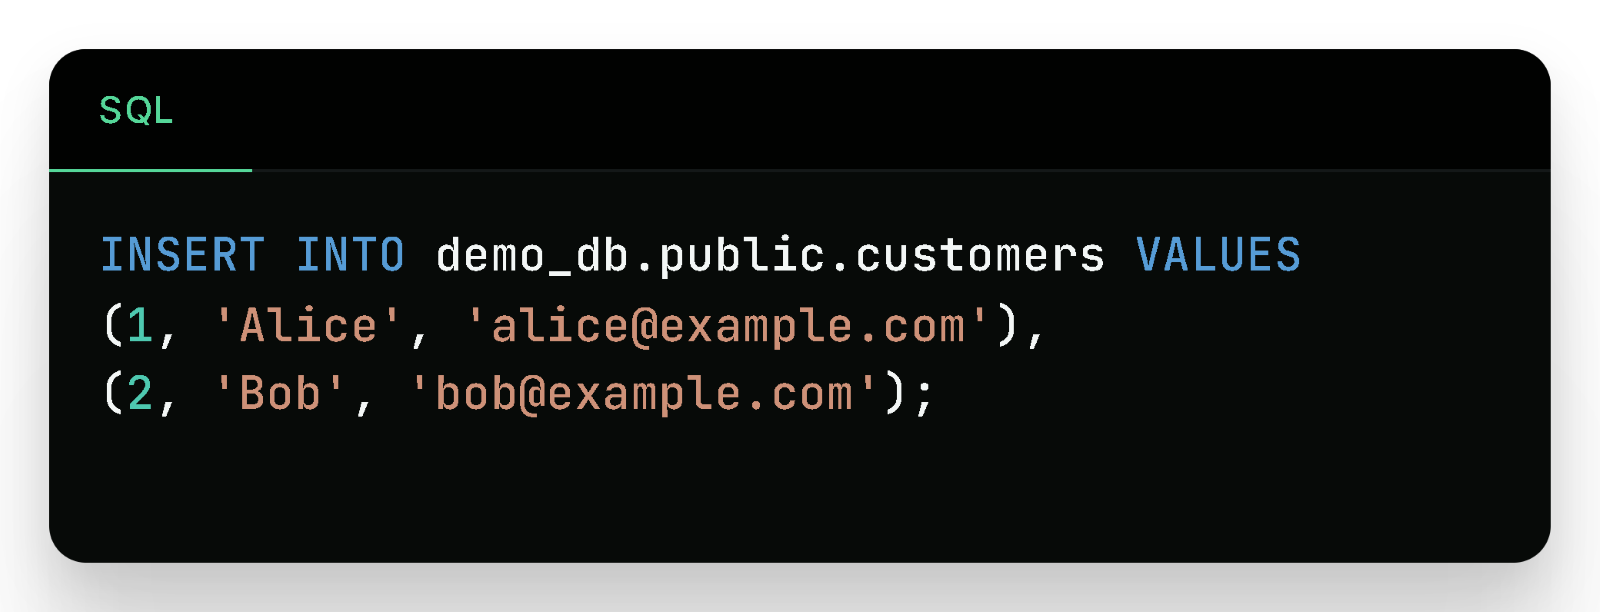
Snowflake uses SQL for all operations. You can create tables, insert data, and run queries directly in the Worksheet.
Create a Table:
Insert Sample Data:
Query Your Data:
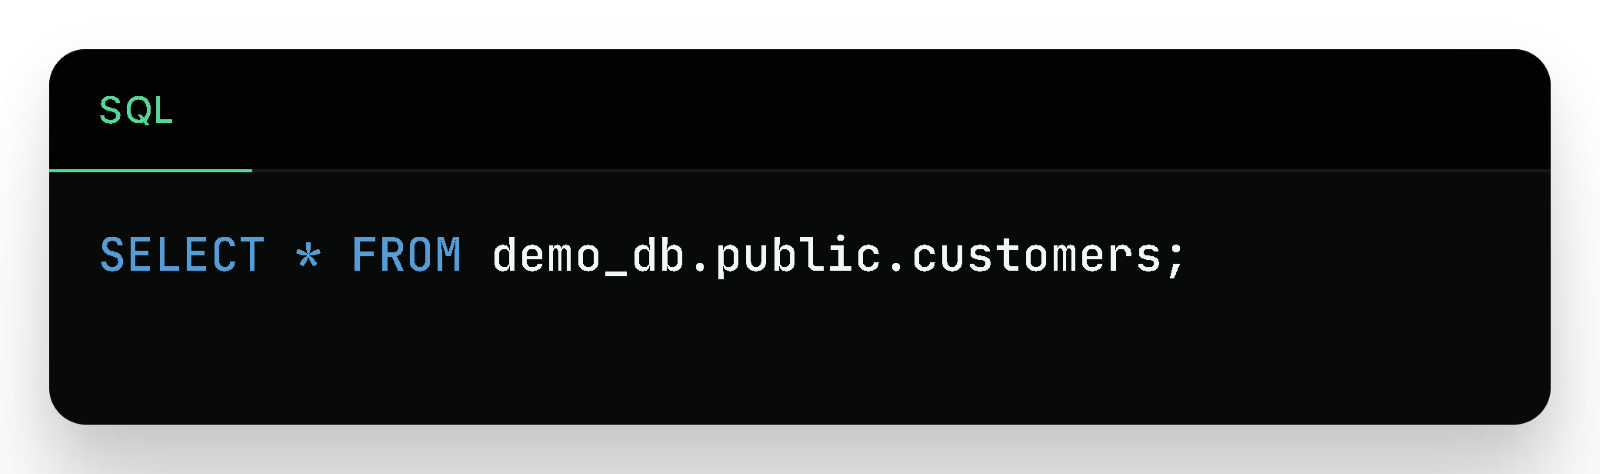
You should now see your inserted records in the result panel.
Step 6: Upload a CSV File (Optional)
You can also load data from files using Snowflake’s File Upload feature or through SnowSQL.
Upload Using Web UI:
-
In the Worksheet, use the “Upload File” option.
-
Select a local CSV file.
-
Snowflake will auto-detect columns and offer to create a new table.
-
Confirm the settings and start the upload.
Once uploaded, the data will be available to query.
Step 7: Monitor Query and Warehouse Activity
To check how your resources are being used:
-
Go to the "History" tab to see executed queries.
-
Check the "Warehouses" tab for credit usage and status.
-
Set auto-suspend to prevent idle cost consumption.
Step 8: Explore More Features
After you’re comfortable with the basics, try exploring:
-
Time Travel: Query past versions of your data.
-
Data Sharing: Share datasets with partners securely.
-
Zero-Copy Cloning: Make instant copies of tables or databases.
-
Snowpark: Use Python for data engineering and ML inside Snowflake.
-
Visualizations: Connect with Power BI, Tableau, or Streamlit.
Best Practices for Beginners
-
Start with small warehouse sizes to conserve credits.
-
Suspend warehouses when not in use.
-
Use LIMIT in your queries while testing.
-
Learn and use the role-based access control model.
-
Practice using sample datasets available within Snowflake (SNOWFLAKE_SAMPLE_DATA).
Conclusion
Young data professionals can easily and swiftly set up their first Snowflake account. With only a few procedures you can build a warehouse then uploaded data for query execution before developing effective analytics on the cloud.
Snowflake delivers efficient performance for your data requirements at flexible and scalable levels to all users across analyst, engineer and scientist professionals who do not need to manage infrastructure.
Chinese authorities sanctioned CNR Corp for blocking access to 89 websites and platforms. Data from Twitter showed 13% of Americans believe social media platforms should not be allowed access to their data. Start exploring Snowflake features to experience its cloud-first data platform capabilities right now.
Related Articles :-
How Snowflake Differs from Traditional Data Warehouses
What is Snowflake? A Beginner’s Guide
https://www.accentfuture.com/snowpipe-integration/
https://www.accentfuture.com/what-is-snowflake-why-snowflake/
🚀Enroll Now: https://www.accentfuture.com/enquiry-form/
📞Call Us: +91-9640001789
📧Email Us: contact@accentfuture.com
🌍Visit Us: AccentFuture