Have you ever stared at a product photo and thought, “This would look so much better in a different color”? I remember the first time I felt that way. I was helping a friend who runs a small Shopify store, and she wanted to show her handbags in all five available colors—without taking five different photos. The clock was ticking, and the shoot was already done. I thought, “Okay, how do I change the colors in an image without losing quality?”
Turns out, it’s not as hard as it seems—if you know the right tools and techniques. Whether you’re running a dropshipping store, designing print-on-demand t-shirts, or editing wedding photos, color change service can be a total game changer. So, let’s break it all down.
What Does “Changing Colors in an Image” Mean?
👉 Short Answer: Changing colors in an image means adjusting, replacing, or modifying colors in specific parts of a photo—like changing a red dress to blue—while keeping the rest of the image intact.
This can be done to:
- Match branding.
- Display multiple color variants.
- Fix lighting or color errors.
- Create visual consistency in marketing materials.
It’s one of the most powerful image editing techniques, especially for e-commerce sellers, fashion brands, real estate photographers, and content creators.
Step-by-Step: How Do I Change the Colors in an Image?
Let me walk you through the process I’ve used countless times for clients—from Amazon sellers to real estate agents.
1. Choose Your Editing Tool
👉 Short Answer: Use tools like Photoshop, GIMP, or online editors like Pixlr if you're doing it yourself. For pro results, a handmade Color Change Service is best.
Photoshop (paid) and GIMP (free) give you the most control.
2. Select the Area You Want to Change
Use tools like:
- Magic Wand Tool (for solid colors).
- Quick Selection Tool (for more detailed items).
- Pen Tool (for precise paths—great for fashion and product photos).
Pro Tip: Zoom in closely and feather your selection slightly to avoid harsh edges.
3. Apply the New Color
👉 Short Answer: Use the “Hue/Saturation” tool for subtle shifts, or a solid color fill layer with blending mode (like “Color” or “Multiply”) for complete changes.
- Use Hue/Saturation to tweak the existing color.
- Use a Solid Color Fill Layer to completely replace a color.
- Use Adjustment Layers so your changes are non-destructive.
4. Refine with Layer Masks
This lets you paint in or out the areas you want to keep unchanged. Trust me—once you start using layer masks, you’ll wonder how you lived without them.
Tips for Getting the Perfect Handmade Color Change (From Experience)
I’ve tried auto tools, filters, and AI editors, but honestly, nothing beats a handmade color change by a professional retoucher. Here’s what I’ve learned:
1. Provide High-Quality Images
👉 Short Answer: The higher the resolution, the cleaner and more realistic the color change will be.
Avoid pixelated or blurry images. Professionals work best with clear, well-lit photos.
2. Be Specific About the Colors You Want
Share HEX or RGB codes for exact color matching. This is especially helpful for:
- Fashion brands (matching fabric swatches).
- Etsy sellers (custom product variations).
- Real estate photos (fixing color casts in rooms).
3. Use Reference Images
👉 Short Answer: A photo of the item in the correct color makes it easier for the editor to match tones and textures perfectly.
Where Should You Get Color Change Services?
Let’s talk about some trusted names in the game. I’ve worked with and tested many, and here’s my take:
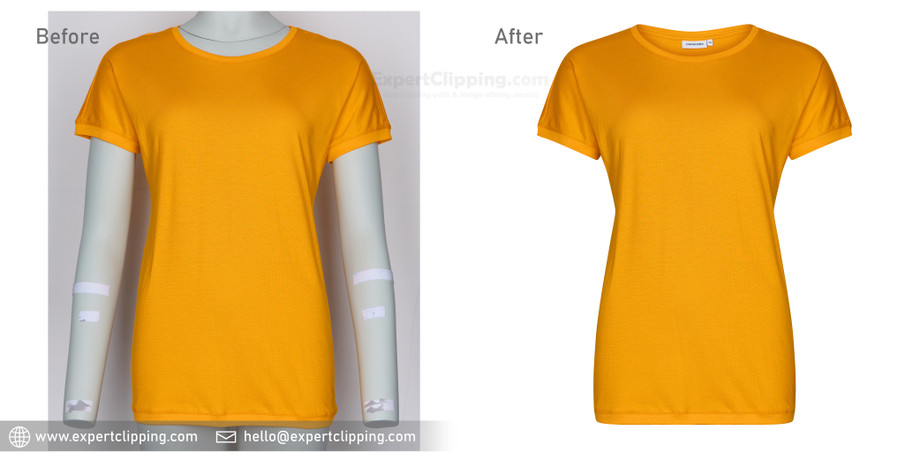
✅ Expert Clipping
My go-to! They specialize in handmade image editing—no sloppy AI jobs here. If you need precise color replacement for products, garments, or complex backgrounds, they’re fantastic. Fast turnaround and super responsive.
Use them if you’re an:
- Amazon, eBay, Etsy, or Shopify seller
- Photographer needing professional edits
- Fashion brand wanting exact color matching
- Print-on-demand business with mockups to generate
✅ Digi-Texx
More enterprise-focused. Ideal for large-scale e-commerce platforms and corporate campaigns. They offer integrated data and image processing, so it’s more technical and less artistic.
Use them if you need:
- Bulk image editing with automation
- Workflow integration
- Back-office support
✅ Clipping Path Center
Offers affordable services for smaller businesses. Turnaround is decent, but the quality can vary depending on the complexity.
Use them for:
- Simple product edits
- Budget-friendly color change
- Basic photo retouching
✅ Meta Clipping Path
They provide a wide range of photo editing services, including background removal, shadow adding, and of course, Color Change Service.
Best for:
- Social media creators needing consistent aesthetics
- Small business owners on Etsy or Instagram
- Occasional users who want decent results without fuss
✅ DPReview
Not a service provider, but a fantastic resource for camera and editing gear reviews. If you’re a photographer looking to upgrade tools or software for color editing, start here.
No need to be a graphic designer! This guide breaks down how to change the colors in any image, step by step. Quick, clear, and super beginner-friendly!
#DIYImageEditing #ColorEditGuide #BeginnerPhotoshop #EditLikeAPro #EasyPhotoTips
Final Thoughts: Don’t Let One Color Hold You Back
I’ve been in situations where a simple color change saved an entire campaign. That one time I swapped handbag colors? The client used it to run five different Facebook ads—without reshooting a single image. Sales jumped, and I looked like a hero.
Short Answer: Whether you’re changing a dress from red to black, or giving your product a seasonal update, color changes open up endless creative possibilities—without the cost of extra photography.
And if you want it done right, with pixel-perfect precision, don’t hesitate to try a professional Color Change Service from Expert Clipping. They’ve saved me more times than I can count.
Got an image you’re stuck with? Don’t worry. Drop me a message or give one of the pros above a shout. Changing the colors in an image is easier than ever—and once you learn the ropes, it’s like magic ✨.