If you're looking to update your flooring, installing tile over concrete can be a great option. Whether you want to add a fresh look to your space or replace an old floor, tile provides durability, versatility, and aesthetic appeal. If you're considering installing tile over concrete, here's a step-by-step guide to help you through the process.
Tools and Materials You'll Need
Before you begin, gather the following tools and materials:
- Safety goggles and gloves
- Chalk or pencil
- Tape measure
- Level
- Notched trowel
- Tile spacers
- Tile adhesive
- Tiles of your choice
- Grout
- Grout float
- Sponge
Step 1: Prepare the Concrete Surface
Start by preparing the concrete surface. Ensure that the concrete is clean, dry, and free from any cracks or damage. Sweep or vacuum the area to remove any debris or dust. Use a degreaser or etching solution to clean the concrete if necessary. This step is crucial to ensure proper adhesion of the tile.
Step 2: Measure and Plan
Measure the dimensions of the area where you'll be installing the tile. Use chalk or pencil to mark guidelines on the concrete, indicating the layout and pattern you want to achieve. This will help you plan the tile placement and ensure a balanced and aesthetically pleasing result.
Step 3: Apply Tile Adhesive
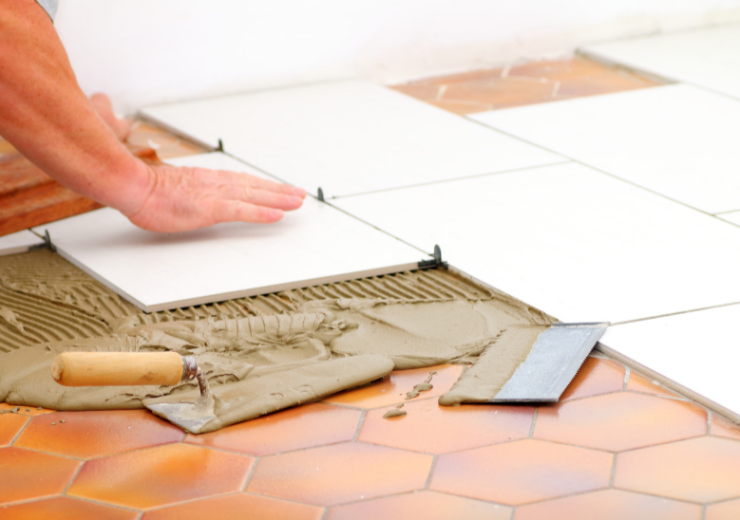
Using a notched trowel, apply a layer of tile adhesive onto the concrete. Work in small sections to prevent the adhesive from drying out before you can lay the tiles. Spread the adhesive evenly, making sure to create grooves with the notched side of the trowel. The grooves will aid in the tile's adhesion to the concrete.
Step 4: Place the Tiles
Carefully place the tiles onto the adhesive, following the guidelines you marked in Step 2. Press the tiles firmly into the adhesive, ensuring they are level and evenly spaced. Use tile spacers to maintain consistent gaps between the tiles. Continue this process until all the tiles are laid.
Step 5: Allow the Adhesive to Dry
Once all the tiles are in place, allow the adhesive to dry completely. Refer to the manufacturer's instructions for the recommended drying time. It's important to avoid walking on or disturbing the tiles during this period to ensure proper adhesion.
Step 6: Grout the Tiles
After the adhesive has dried, it's time to grout the tiles. Mix the grout according to the manufacturer's instructions. Use a grout float to apply the grout onto the tile surface, pressing it into the gaps between the tiles. Work at a diagonal angle to ensure full coverage. Remove any excess grout from the tile surface using the edge of the float.
Step 7: Clean the Tiles
After allowing the grout to be set for a short period, use a damp sponge to clean the tile surface. Gently wipe away any excess grout, taking care not to remove grout from the gaps between the tiles. Rinse the sponge frequently to ensure a thorough cleaning.
Installing tile over concrete can be a rewarding and transformative project. By following these step-by-step instructions and using the right tools and materials, you can achieve a beautiful and durable tile installation. Remember to prepare the concrete surface properly, plan the layout and pattern, and ensure proper adhesion of the tiles with the adhesive. Take your time during the grouting process to achieve clean and professional-looking results. With patience and attention to detail, you can enjoy a stunning concrete tile floor that enhances the aesthetics of your space for years to come.
Initial Tiles & Bathware
26 Sterling Rd, Minchinbury NSW 2760, Australia
https://initialtilesandbathware.com.au/
+61 (02) 9623 0000