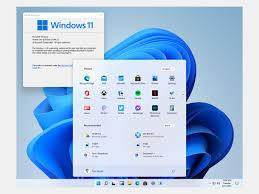
Microsoft's latest operating system, Windows 11, includes a slick new interface, improved speed, and a slew of new features aimed at increasing productivity and entertainment. Whether you're upgrading from Windows 10 or starting over, this tutorial will lead you through the process of downloading Windows 11 on your PC.
System Requirements for Windows 11
Before you begin, ensure that your device is compatible with Windows 11. Microsoft has specified system requirements for this new OS:
- Processor: 1 GHz or faster with at least two cores on a compatible 64-bit processor or system on a chip (SoC)
- RAM: 4 GB or more
- Storage: 64 GB or larger storage device
- System Firmware: UEFI, Secure Boot capable
- TPM: Trusted Platform Module (TPM) version 2.0
- Graphics Card: DirectX 12 compatible graphics / WDDM 2.x
- Display: >9” with HD Resolution (720p)
- Internet Connection: Internet connectivity is necessary to perform updates and download features like Microsoft Teams.
To see if your device satisfies these requirements, download Microsoft's PC Health Check Tool. This program will automatically test your system and notify you if your hardware supports Windows 11.
Steps to Download and Install Windows 11
1. Check for Free Upgrade (For Windows 10 Users)
If you already have Windows 10, you may be eligible for a free upgrade to Windows 11. Microsoft is rolling out Windows 11 to eligible Windows 10 devices through Windows Update. Here's how you can check for it:
- Launch Settings from the Start menu.
- Navigate to Update & Security > Windows Update.
- Click on Check for Updates.
If your device is eligible, you will be prompted to download and install Windows 11. Simply follow the on-screen instructions to start the installation procedure.
2. Download Windows 11 Installation Assistant
If the update isn't available via Windows Update, you can use the Windows 11 Installation Assistant:
- Visit the Windows 11 download page.
- Click on Download Now under "Windows 11 Installation Assistant".
- Run the downloaded file and follow the instructions to upgrade your system.
3. Create a Bootable USB Drive for Clean Installation
If you prefer a clean installation or need to install Windows 11 on a new PC, you can create a bootable USB drive. Here's how:
- Visit the Windows 11 download page.
- Click Download Now in the box titled Create Windows 11 Installation Media.
- To build a bootable USB stick, run the Media Creation Tool and follow the steps (at least 8GB is necessary).
- Once created, restart your computer and boot from the USB drive. Follow the installation prompts to finish installing Windows 11.
4. Download Windows 11 Disk Image (ISO)
If you want full control over the installation process or need an ISO for a virtual machine, Microsoft provides a downloadable Windows 11 ISO file:
- Go to the Windows 11 ISO downloads section.
- Under Download Windows 11 Disk Image (ISO), select Windows 11 and click Download.
- Select your language and click Confirm.
- To begin the download, select the 64-bit option.
- After downloading the ISO, mount it or use Rufus to make bootable media.
Post-Installation: Setting Up Windows 11
Once Windows 11 is installed, you’ll go through a series of setup screens:
- Language and Region Settings: Choose your preferred language and region.
- Sign in to Microsoft Account: You'll be prompted to sign in to your Microsoft account. This will sync your settings, apps, and files from other devices if you're using cloud services.
- Privacy Settings: Customize privacy settings, including location tracking, diagnostics, and personalized ads.
After completing these steps, you'll be greeted with the brand-new Windows 11 desktop interface.
Conclusion
Windows 11 includes an updated Start menu, new window management capabilities such as Snap Layouts, and improved security measures. The method is the same whether you're upgrading or installing for the first time. By following the methods indicated in this guide, you'll have Windows 11 installed and operational on your device in no time.

