THIS GUIDE IS A BIT OUTDATED, THOUGH A LOT OF INFO IS STILL USABLE.
Before starting
I just want to make this clear. This guide is based on my experience with upscaling, so it might not be exactly perfect, but I think it is a good place to start. With that being said, this guide will walk you through the next things:
- Installing and setting up ESRGAN (using Cupscale, a GUI made by N00MKRAD)
- ESRGAN models (introduction and downloading them)
- Preparing your image for upscaling
- Upscaling (duh)
- Tips and tricks, model combinations, etc.
1. Installing ESRGAN
To start, download Cupscale.exe from the latest Cupscale release here:
After that, you can run the program by simply clicking on the executable file.
It will start installing the files for ESRGAN and other things the program needs to run.
After it finishes setting up, it will tell you that the model path is invalid.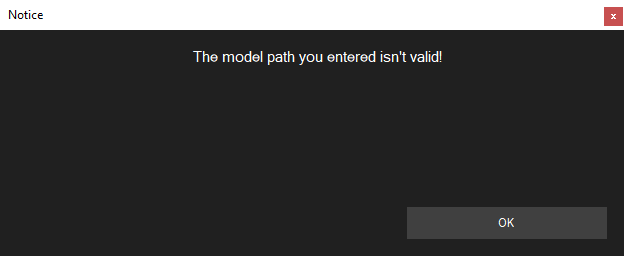
For now, we will just ignore this, as we are not going to install models right now.
Just click OK and close the settings window.
Now there are 3 ways you can run ESRGAN:
- CUDA (faster in Nvidia cards, requires Python and CUDA compatible Nvidia card)
- Vulkan (faster in AMD cards, only needs Vulkan compatible device)
- CPU (slowest, requires Python)
Installing Python (only for CUDA and CPU)
You will need a Python installation to run ESRGAN on CUDA/CPU. Luckily, Cupscale has the option to install a Python runtime on its data folder with just some clicks.
Extra note:
The embedded Python runtime will not work with Ampere cards,
so if you have one, you will have to install Python by yourself.
Don't worry, though, I will also add instructions for it.
To start, you have to click this icon, which is located in the top right corner of the window,
it will open a Dependency checker, which you will be using later to check if everything has installed correctly, but for now don't pay attention to it...unless you already have Python installed, in that case just skip ahead some paragraphs.
Ok, so the next step is to click the Embedded Python Installer tab, and then click install.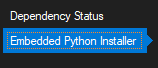
It will start downloading the files into the Cupscale data folder, after that it will compress it so that it doesn't take up a lot of space (this might take a while, so be patient).
When it finishes, you should now go back to the Dependency Status tab,
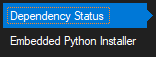
it should look similar to this:
GPU: Available
Nvidia GPU: [Will show up your NV GPU if you have one]
System Python: Not found [unless you have local Python]
Embedded Python: Python 3.8.5
[Python] Torch: 1.6.0 [Might be different if you have local Python]
[Python] OpenCV 4.3.0 [Might be different if you have local Python]
Your options:
CPU Upscaling: Available
Nvidia CUDA Upscaling: Available
NCNN/Vulkan Upscaling: Available
If everything is alright, then we can skip to the next section. If you were waiting for the local Python installation instructions, then continue reading.
Installing Python locally ("advanced" users only...or ampere owners)
Welcome to the local Python installation manual.
After some weeks in development,
hopefully it would have been worth the wait.
Installing Python is only needed in case you are using an Ampere GPU or if you prefer to manage the installation by yourself. It can seem like a tedious process, but in reality it is very easy. Put it simply, there are some settings that people tend to forget while installing it.
I will divide this in 2 sections:
- Installation
- Packages
- Installing with Pip
- Installing from wheel
Installing
First, you have to download the latest Python 3.8 release from the next link:
- Python 3.8.10 - Windows installer (64-bit) (Will update link if there is a new release)
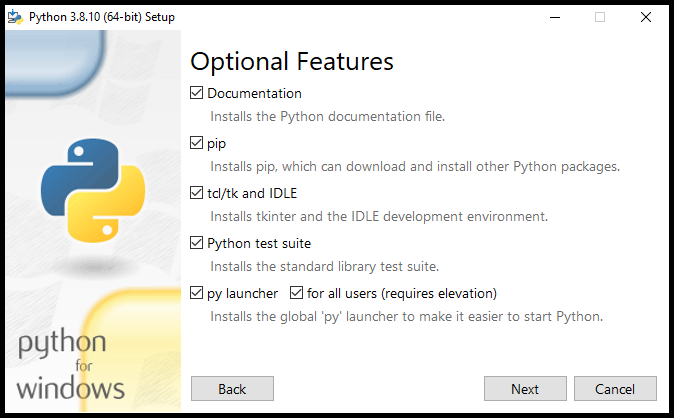
When it finished downloading, open the executable. A window like this should appear:
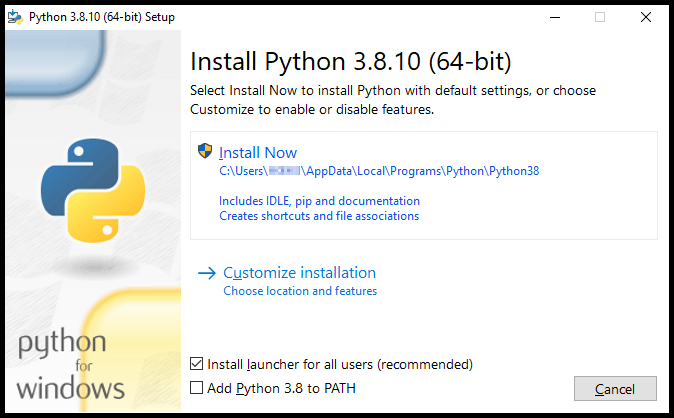
First thing you are going to do is tick the Add Python 3.8 to PATH option. After that, simply click Install Now.
Your Python installation should be located in C:\Users\USER\AppData\Local\Programs\Python.
If you prefer to install it inside another directory, then proceed to Custom Installation instead. On the next 2 pages, make sure everything is similar to the next images:
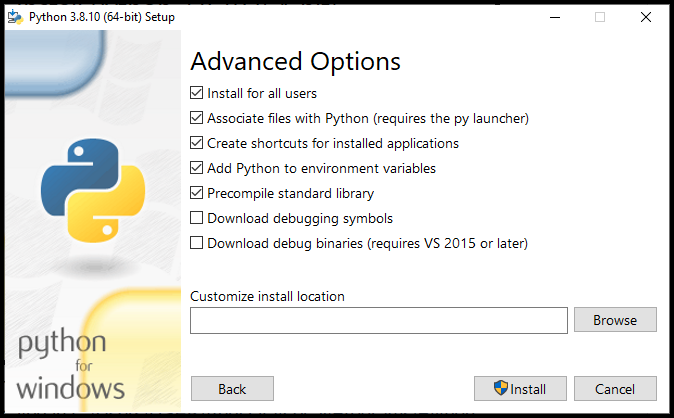
You want to make a folder where you want Python to be installed and select the directory to it. I personally make a Python38 folder in the root of my C: drive and the path is C:/Python38. If everything looks good, then click Install.
Should have written this earlier, but make sure the custom
folder doesn't require admin permissions to read or write into.
Avoid Program Files at all cost.
Packages
ESRGAN requires certain packages to work on CUDA/CPU. This can be installed in 2 main ways:
- Using the Pip package manager (comes with Python)
- Installing from a wheel (also with Pip)
Using Pip
Pip is a package manager that is included with Python. It makes installing different packages very easy.
To use it, you will need to open a Command Prompt or PowerShell window. Then you will need to enter the next line to install PyTorch, depending on what you require:
- If your GPU is not of the Ampere series
pip install torch==1.8.2+cu102 torchvision==0.9.2+cu102 torchaudio===0.8.2 -f https://download.pytorch.org/whl/lts/1.8/torch_lts.html
- If your GPU is of the Ampere series
pip install torch==1.8.2+cu102 torchvision==0.9.2+cu102 torchaudio===0.8.2 -f https://download.pytorch.org/whl/lts/1.8/torch_lts.html
After PyTorch, you will need to install the remaining package(s) using the next line:
pip install opencv-python
If everything installed correctly, you can proceed to the next section, otherwise continue reading.
Using a wheel (.whl file)
Installing a package from a wheel isn't that much of an issue, but the use of Pip directly is preferred.
First thing you are going to do is download the wheels from the next links:
- torch 1.8.2 with CUDA 10.2 (if your GPU is not of the Ampere series)
- torch 1.8.2 with CUDA 11.1 (if your GPU is of the Ampere series)
- opencv-python 4.5.4.60
After that, open a Command Prompt or PowerShell window and use the next line for each wheel:
pip install <path to wheel>
Good, now the packages are installed and you can use ESRGAN with CUDA/CPU. You can check if it is working correctly by opening the dependency checker and verifying that Python and the dependencies are being detected by the program.
2. ESRGAN Models
A model is the file that has the instructions for ESRGAN on how to upscale/modify an image. Unlike similar upscaling programs, Cupscale doesn't include any models. The reason being there are a lot of models you can get, each one with a different purpose and/or different changes they can make to an image.
ESRGAN models are usually labeled as 1x, 2x, 4x or 8x. This is the upscaling factor that is hard-coded with the model, and it can't be changed. This just means that if you wanted to do 2x out of 4x models you would have to downscale after, or if you wanted to do 4x out of 2x models you would have to run the same model twice.
Downloading
I would recommend making a special folder to store ESRGAN models. This folder can be located anywhere as long as it doesn't require admin permission to access it.
Ordering models in subfolders, depending on what they can do, it's something I also recommend. I like to have reference as where I could find a certain model for a certain purpose, though it is not exactly necessary.
The various sites where you can download models are listed next:
- The Game Upscale Wiki
- The Game Upscale discord server
- N00MKRAD's website
Just search for a model you are curious to try out...or download a bunch of them at the same time, you never know when you will need them 😉.
Which model to use?
Choosing a model for ESRGAN is a bit complicated. A model is only as good as the data it was trained on, and what this means is that a model that was trained on IRL images will probably struggle with stuff like anime and vice versa. Answering the question "What is the best model?" is a hard since there are a lot of models that can lead to different results, though it is worth mentioning that there are models that can be considered good in general situations.
Selecting a model
Ok, so now we have some models sorted in a folder or something like that, but how do we give them to Cupscale.
Well first you have to open the settings which are located in the gear icon
in the top right corner. Click on it and a tab will pop up. You are going to
click on the 3 dots next to Models Path. 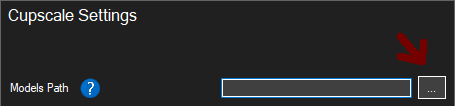 After that, you will find the root of the folder where you are stored the models and select it.
Congratulations, now you are ready to use the program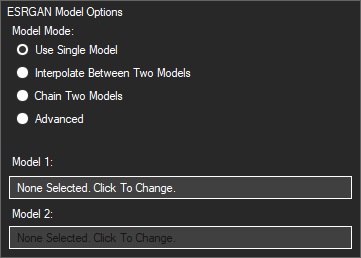
to select a model. If you still haven't found out how, the
model selection is done on the left side of the window.
We got 4 options
- Use Single Model
- Interpolate Between Two Models
- Chain Two Models
- Advanced
For now, just stick to use Single Model for testing and familiarizing with the program. We will use the other options later.
3. Preparing an image
Now I consider this part the most important of all because it can help you to get clearer images in most cases.
Before we start, I want to explain why preparing an image can be important.
As said before, a model is only as good as the data it was trained on. This means if a model was trained on images without compression artifacts, the model might struggle on images that actually contain artifacts, which sadly is the case for most of the content on the internet. There are some models that were trained with artifacts into account, but even then they might not be perfect and could still generate some ugly upscaling artifacts. This is where preparing the image comes in place. I will list some things that you can do to your image before properly upscaling it, so that you can get the best quality.
The order of priority is from high to low:
-
- Pre-upscaling
Sometimes an image might have been already upscaled before, this can cause some issues as the AI might not be able to handle this properly. To solve this, we are gonna downscale our image before we upscale it. The downscaling factor can vary, but usually between 50% to 25% are good values. Note that downscaling first might kill some details in images that are not already upscaled, so avoid as much as you can.
-
- Blur
This is very similar to already upscaled images. The best way to fix it is by downscaling before processing it. You could also edit the image in a program to make it a bit sharper instead, or use a 1x de-blur model with ESRGAN
-
- Noise
Noise is very common in images taken with cameras, but it should not be mistaken with JPG artifacts, since they are a completely different thing. My way of handling this is by using a 1x denoise model on the image, or edit it with any program that can de-noise.
-
- Dithering
Dithering is a very common technique used in GIFs to compress the media even more, it usually results in some ugly artifacts. For this, any 1x de-dither model will do the job.
-
- DDS compression
DDS compression is commonly used in video game textures to compress them, allowing a lower VRAM usage when gaming. For this, any 1x model that can fix DDS compression will do the job.
-
- JPG compression
JPG is a lossy image format which is commonly used around the internet for it's very small file size in comparison to PNGs. There are many models to fix JPG compression on images and each can do it in different ways. I would recommend using 1x models that specialize on certain JPG compression levels (60-40 for example). You can also use the more generalized 1x models to remove JPG artifacts, but I usually perceive more quality on the other ones.
I want to make clear something because I forgot to do it before. This priority list is only based on my experience with upscaling, so it might or might not be correct and others might have different opinions about it. In the end, just try to understand what every model can do and which ones you actually prefer to use.
4. Upscaling your image
Now, this part is actually the fun part. So now that we have learned the basics about preparing an image we are ready to get it upscaled to infinite and beyond!...well maybe not that much but at least by 2x, 4x or 8x
In this part, I'm going to explain what each function
does in ESRGAN Model Options tab:
- Use Single Model
Pretty self-explanatory. It will only use a
single selected model to upscale the image
- Interpolate Between Two models
This option will allow you to interpolate between two models, or in other words, make a combination of two models as one. The interpolation is done by balancing the strength of each model (between 0 and 100).
Note: there are some requirements for models to interpolate, but as far as I remember, at minimum the upscaling factor has to be the same to be able to interpolate.
- Chain Two Models
This will allow you to upscale your image by chaining 2 selected models. Unlike the last option, this one is similar to running the models consecutively. You should usually use this to chain a de-artifact model and a normal upscaling model.
- Advanced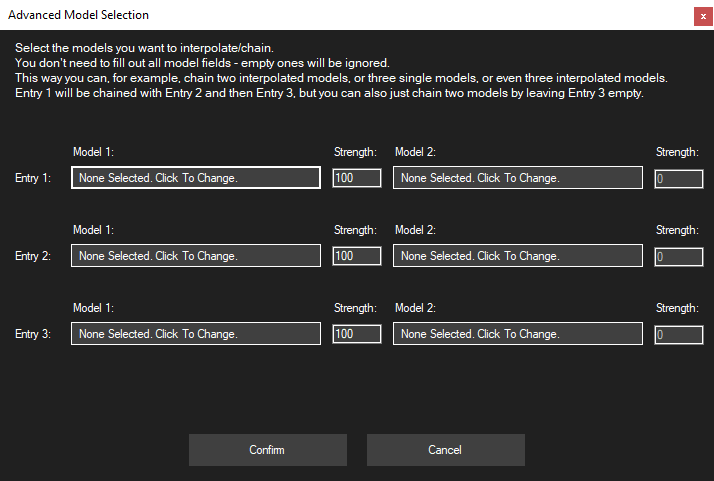
This option, as the name says, allows you to do
some more complex combinations of models.
You can chain up to 3 different models, and it also allows you to interpolate each one of those chains with another model.
It includes a description already, so just read it and experiment with it
This can be useful for more complex upscaling, but on my experience you won't be using it that much.
5. The end
I am going to be honest, this guide sucks, but even then it kinda explains the basics of using ESRGAN (with cupscale). I just wanted to make it easier to understand the process of installation.
If you have any questions, want me to change something or just want to bother me a bit you can ping Katzenwerfer#2028 on discord in the DAIN-APP server, the Game Upscale server or NMKD's server.
Next section is just going to be a showcase of some model combinations and their results that I might or might not update now and then.
Model Showcase
Coming soon... :(