
In the world of custom apparel, Direct-to-Film (DTF) transfers have quickly gained popularity for their versatility and vibrant results. Ready-to-press DTF transfers, in particular, have made it even easier to achieve professional-quality designs on a range of fabrics without the need for specialized equipment. But each fabric type comes with its unique qualities, and understanding how to apply DTF transfers ready to press on each can help you get the best results.
In this post, we’ll go through the step-by-step process of applying ready-to-press DTF transfers, along with key tips and adjustments for popular fabric types like cotton, polyester, and blends. By the end, you’ll be equipped to get crisp, durable designs on any fabric you choose!
What are DTF Transfers Ready to Press?
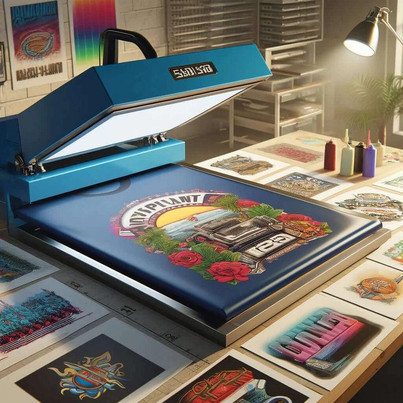
DTF transfers involve printing designs on a special film using a DTF printer and applying adhesive powder to make the designs stick. Once printed, the design is ready for heat pressing directly onto fabric. Ready-to-press DTF transfers are pre-made, so you only need a heat press to apply them to garments. They’re widely used because they produce vibrant colors, work on various fabric types, and are durable through many washes.
Tools You’ll Need
To get started, gather the following essentials:
-
A ready-to-press DTF transfer of your chosen design
-
A heat press (manual or automatic)
-
Teflon or parchment paper for protection
-
A lint roller (for fabrics prone to lint)Ruler or measuring tape for precise positioning

Step-by-Step Guide for Applying DTF Transfers
Step 1: Set Up Your Workspace
Ensure you’re working on a clean, flat surface. Clear any dust or debris, as even the smallest particles can affect the design’s adherence and appearance. Set your heat press in a well-ventilated area, as high temperatures may cause some fumes.
Step 2: Prepare Your Fabric
Different fabrics need different preparation:
-
Cotton: Cotton is known for its breathability and is easy to work with. Use a lint roller to remove any debris.
-
Polyester: Polyester is a synthetic material sensitive to high heat. Make sure it’s free of lint, and double-check heat settings to avoid scorching.
-
Blends (e.g., cotton/polyester): For blends, handle with care similar to polyester. Blends are versatile but can react differently depending on their specific fabric mix.
To prevent creases and ensure a smooth application, consider pre-pressing the fabric (press it with a heat press for 3-5 seconds). This also removes any moisture.
Step 3: Position the DTF Transfer
Place your fabric on the heat press. Use a ruler or measuring tape to ensure the design is centered. For T-shirts, positioning varies based on size, but a general guideline is to place the top of the design 2-3 inches below the collar.
Position the DTF transfer with the printed side down on the fabric. Once you’re confident in the placement, you’re ready to press.
Step 4: Set the Heat Press
Each fabric type has specific heat settings for optimal results. Follow these guidelines:
-
Cotton: Set the heat press to around 320°F (160°C) for 10-15 seconds.
-
Polyester: Set the press to 285-300°F (140-150°C) for 8-10 seconds, keeping in mind that polyester can scorch easily.
-
Blends: Aim for a middle ground—around 305°F (150°C) for 10-12 seconds.
Always refer to the instructions that came with your DTF transfer, as some transfers may have slight variations in temperature and time requirements.
Step 5: Apply Pressure
Once your heat press reaches the desired temperature, place Teflon or parchment paper over the transfer. This protective layer helps distribute the heat evenly and prevents the transfer film from sticking to the heat press.
Close the heat press and apply firm, even pressure. Hold the press steady without moving it to prevent smudging or incomplete transfer.
Step 6: Let the Transfer Cool (or Not)
DTF transfers vary between hot-peel and cold-peel types:
-
Hot-Peel DTF Transfers: Peel the film immediately after pressing. Hot-peel transfers often give a softer finish and are quicker to apply.
-
Cold-Peel DTF Transfers: Allow the transfer to cool completely before peeling. Cold-peel transfers can produce crisper results and better adhesion on some fabrics.
Check your DTF transfer instructions for the correct peeling type.
Step 7: Peel the Film
After waiting the appropriate time for cooling, peel the film in one smooth motion. Start at one corner and work your way across. For best results, peel in a single, fluid motion rather than tugging or jerking, as this can lift parts of the design.
Step 8: Re-Press (Optional)
For added durability, consider re-pressing the fabric after peeling the film. Place Teflon or parchment paper over the design and press for another 5-10 seconds. This step is optional but can help set the design further, making it more wash-resistant.
Tips for Applying DTF Transfers on Different Fabrics
Each fabric reacts uniquely to heat and pressure, so here’s a breakdown for the most common ones:
-
Cotton: Cotton is easy to work with and holds DTF transfers well. Be mindful of setting the heat press at 320°F and applying firm pressure.
-
Polyester: Be careful with high heat to avoid melting or discoloration. A lower temperature and a cold-peel transfer are best to prevent damaging the fibers.
-
Nylon: DTF transfers can work on nylon, but they may not last as long due to the fabric's slick surface. Lower the temperature to around 275°F and use a cold-peel transfer.
-
Spandex and Stretch Fabrics: These can be tricky, as they’re sensitive to heat and stretching can distort the design. Use lower temperatures and consider using a stretch-compatible DTF transfer for the best results.
Common Troubleshooting Tips
If you encounter issues while applying DTF transfers, here are some common solutions:
-
Design Doesn’t Stick: This could mean your heat press settings were too low. Re-press the fabric with slightly increased heat.
-
Transfer Peels Off After Washing: This is often due to inadequate pressure. Always use firm, even pressure and consider re-pressing if you anticipate heavy wash use.
-
Scorch Marks on Fabric: Reduce the temperature slightly and decrease pressing time. Fabrics like polyester and blends are especially sensitive to overheating.
Final Thoughts
Ready-to-press DTF transfers are a game-changer for anyone wanting quick and high-quality apparel customization. By understanding the nuances of different fabric types and adjusting your heat press settings accordingly, you can produce designs that not only look vibrant but last through repeated wear and washing. Whether you’re working with cotton, polyester, or blends, following these steps will ensure professional, durable results every time. Happy pressing!