The Opticover extender is a Wi-Fi range and speed booster that produces impressive results. This device can be used wirelessly or with a wire, depending entirely on the user. This tiny device can solve any Wi-Fi issues without leaving any gaps. The external antenna ensures that the network remains strong and stable throughout. It is very easy to set up opticover extender, just like other extenders, and it takes very little time to get it to work.
So, here are the simple guide on Opticover wifi extender steps to setup this device:
Opticover WiFi Extender Setup Via WPS-
-
Connect the Extender to the power outlet next to the router and turn on the extender's switch. Check that the opticover repeater is set to Repeater mode.
-
For a few seconds, press the router's WPS button until the light begins to blink.
-
Hold the WPS button on the Extender for approximately 6 seconds before releasing it when the light begins to flash.
-
When the blinking/flashing lights become stable and solid, it indicates that the Extender has been connected to the router and is ready to use.
-
To eliminate dead zones, you can now move the Extender within the network's range. To gain access, select the network with _EXT and your router password.
Opticover WiFi Extender Setup Via Web Browser-
-
Connect the Extender to the power supply and turn it on. Make sure it is in Repeater mode and close to the router.
-
Open your phone's or computer's Wi-Fi list. Connect to the "WIRELESS-N" open network by default.
-
Open the connected device's browser and type ap.setup or 192.168.188.1 into the address bar.
-
On the following page Create a new password for future logins and press the Start button.
-
Choose the router's network, enter a password (not the one you just created), and then click Next.
-
If you want, you can change the SSID or leave it as is. Next, click.
-
Now, double-check your entered information and click Save. Now, ensure that the LED is solid and stable. This ensures your successful setup.
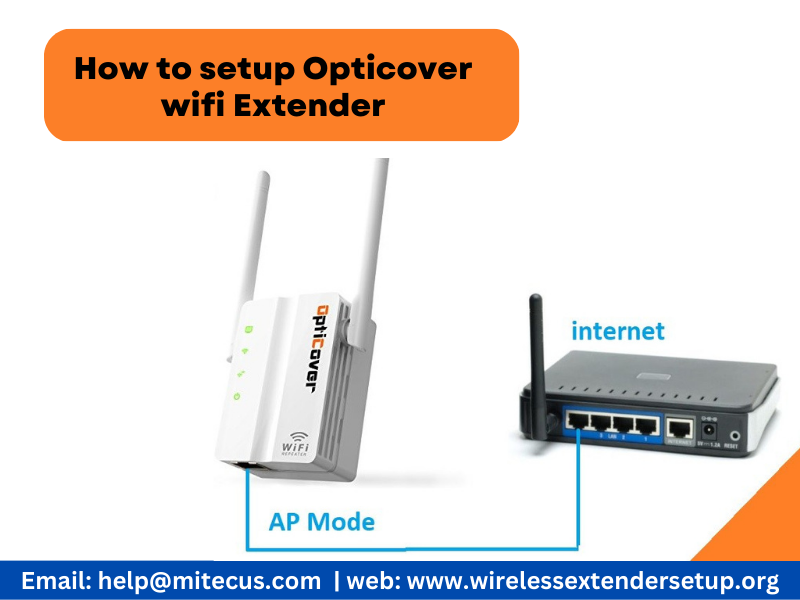
Opticover WiFi Extender configuration As Access Point-
-
Connect your extender to an electrical outlet and ensure it is properly connected and turned on.
-
Slide the switch to Access Point and turn it on. Now connect the router's Ethernet cable to the opticover's LAN port to connect the router and extender.
-
Connect to the extender's default Wi-Fi network "WIRELESS-N" in the phone/computer Wi-Fi list.
-
Open the browser on the connected device and enter "ap.setup and 192.168.188.1" in the address bar.
-
A page will appear prompting you to create a password for future logins.
-
The Opticover Extender setup page will appear in the next window. Select Wizard -> Select Access Point.
-
Enter the old SSID, security type, and password.
-
Wait for the progress bar to fill completely before updating changes and rebooting the device.
-
Opticover Extender is now ready to use as an Access Point after being reconfigured and rebooted. LEDs become solid and stable. Open your Wi-Fi list, connect your devices to the network, and enter the old password to gain access to high-speed internet with a consistent connection.
If you are still facing any issue regarding Opticover WiFi Extender Setup process you can contact us for any further help. also visit our website wirelessextendersetup.org