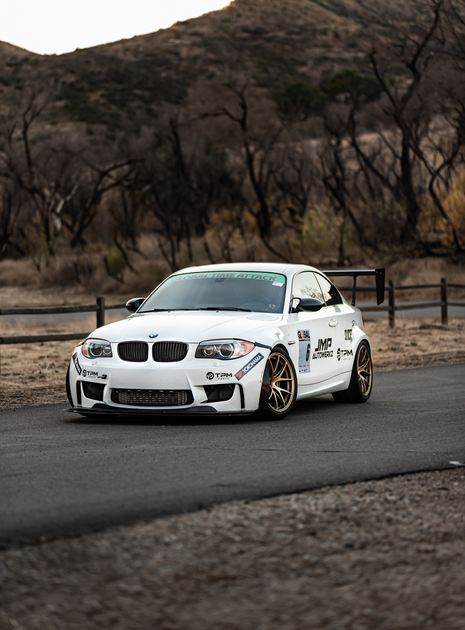
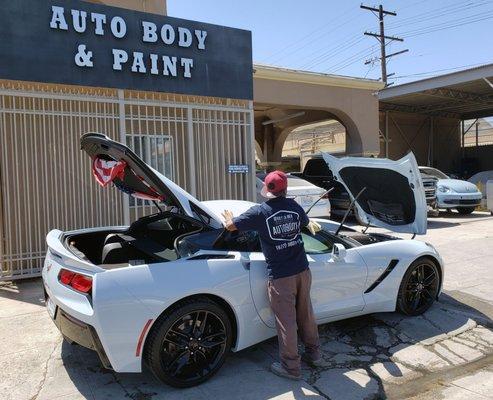
Reliable Collision Damage In Southern California In Your Area
Step-By-Step Auto Body Repair in Southern California Every Driver Should Know
Before attempting any auto body repair in Southern California, you'll need to thoroughly document the damage with photos and assess the extent of repairs needed. Start with basic DIY repairs like paint touch-ups and minor scratch fixes using proper tools and safety gear. For dents, try paintless dent repair techniques on shallow damage, but avoid structural repairs - Paint booth. Always verify your insurance coverage and local regulations first. Understanding these fundamentals will prepare you for handling more advanced repair procedures
Key Takeaways
- Document damage immediately with detailed photos from multiple angles and obtain repair estimates before starting any work in California.
- Assess whether repairs can be DIY or require professional help based on damage severity and California safety regulations.

- For minor scratches, clean the area, sand edges, apply manufacturer-matched paint, and finish with clear coat protection.
- Use paintless dent repair techniques for shallow dents, but seek professional help for structural or multiple panel damage.
- Ensure all repairs comply with California safety standards and maintain thorough documentation for insurance purposes.
Assessing Your Vehicle's Exterior Damage
When should you assess your vehicle's exterior damage after a collision or incident? It's essential to perform a damage evaluation immediately after ensuring everyone's safety and moving to a secure location. Start by documenting the damage with detailed photos from multiple angles, which you'll need for insurance and repair estimation purposes.
Carefully examine your vehicle's body panels, looking for dents, scratches, misaligned components, and paint damage. Check that doors, hood, and trunk open and close properly. Inspect headlights, taillights, and side mirrors for cracks or looseness. Don't forget to assess the bumpers, grille, and underbody areas for hidden damage. If you notice fluid leaks or mechanical issues during your evaluation, avoid driving the vehicle and contact a professional auto body repair shop immediately.
Essential Tools and Materials for DIY Auto Body Repair
You'll need a basic DIY auto body repair kit that includes body filler, sandpaper, masking tape, primer, and touch-up paint to handle minor dents and scratches. For more extensive repairs, consider investing in advanced tools like a dent puller, dual-action sander, spray gun system, and heat gun. While the initial cost of professional-grade tools might seem high, they'll pay for themselves if you're planning to take on multiple repair projects.
Basic DIY Repair Kit
Before tackling any DIY auto body repairs. Top-rated Brea auto repair in Southern California's climate, a well-stocked toolkit serves as your foundation for success. Your basic repair tools should include safety glasses, work gloves, a respirator mask, and protective coveralls to shield against harmful materials and debris
For repair kit essentials, you'll need body filler with hardener, various grits of sandpaper (80-400), a metal file set, putty knives, and a dual-action sander. Include mixing boards, measuring cups, and spreaders for properly blending materials. Don't forget panel adhesive, primer, and touch-up paint that matches your vehicle's color code. Keep solvents, cleaning supplies, and microfiber cloths handy for surface preparation. Store these items in a durable toolbox to protect them from SoCal's heat and maintain their effectiveness.
Advanced Tools Worth Buying
Three advanced tools elevate DIY auto body repair capabilities in Southern California's demanding conditions. First, invest in a digital paint thickness gauge to measure existing paint layers and guarantee uniform application during repairs. You'll need this precision measuring tool to prevent over-sanding and maintain factory specifications.
Second, acquire a professional-grade dual-action sander with variable speed control. This enables advanced sanding techniques required for smooth finishes (Aftermarket) in SoCal's hot climate, where paint cures differently than in cooler regions
Third, purchase a dent pulling kit with multiple attachments. It's essential for addressing complex damage without disturbing surrounding panels. When paired with a spot welder, you'll have the capability to handle deeper dents while maintaining structural integrity during Southern California's temperature fluctuations.
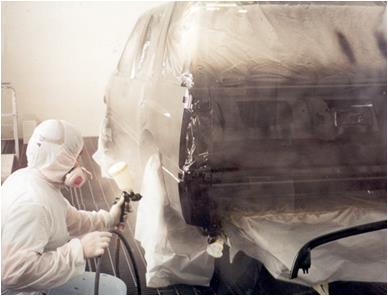
Paint Touch-Ups and Scratch Repair Techniques
Paint touch-up and scratch repair - Vehicle restoration after crash work requires careful surface preparation and precise application techniques to achieve professional results. First, clean the damaged area thoroughly with soap and water, then use a fine-grit sandpaper to smooth the scratch edges. You'll need to determine if the scratch penetrates through the clear coat or extends into the base paint layer
For proper color matching, locate your vehicle's paint code on the driver's door jamb or inside the glove box - Sanding. Purchase a manufacturer-approved touch-up paint that includes both the color and clear coat layers. Apply thin layers of paint using a fine brush or pen-style applicator, allowing each coat to dry completely. Once the color matches, apply the clear coat protection. Wait 24 hours before washing or waxing the repaired area
Dent Removal Methods and Best Practices
When you're facing unsightly dents in your vehicle's body panels, you'll need to choose between paintless dent repair (PDR) techniques or traditional body repair methods depending on the dent's location, size, and severity. PDR involves using specialized tools to carefully massage the metal back into shape from behind the panel, while traditional methods may require body filler, sanding, and repainting. You can attempt minor dent repairs yourself using household items like a plunger or boiling water for plastic bumpers, but significant damage requires professional expertise and industrial-grade equipment.
DIY Dent Repair Steps
Successfully removing dents from your vehicle's body panels requires following proper techniques and using appropriate tools for the specific damage type. Before attempting DIY dent repair methods, assess the damage size, location, and accessibility. Start by cleaning the dented area thoroughly with automotive soap and drying completely.
For shallow dents, use a plunger or dent puller tool by applying firm, controlled pressure. Alternatively, employ the hot glue pulling technique with specialized tabs - Brea Auto Body. For complex dents, consider using a slide hammer kit. Don't make common mistakes like using excessive force or attempting repairs on deeply creased metal. If you're working near paint, protect the surface with a microfiber cloth to prevent scratches. Always work in a well-lit area and stop immediately if you notice paint cracking or metal stretching
Professional Techniques and Tools
Professional auto body technicians utilize specialized equipment and proven methodologies that extend far beyond basic DIY approaches. You'll find they employ pneumatic tools, specialized dent pullers, and computerized paint matching systems to guarantee precise repairs.
During the repair process, technicians use advanced sanding techniques. Welding, starting with coarse-grit paper and progressing to finer grits for ideal surface preparation. They'll apply professional paint blending methods to seamlessly match your vehicle's original finish, using computerized color matching and professional spray equipment
For structural repairs, they rely on frame straightening machines and electronic measuring systems to restore your vehicle's exact specifications. Metal finishing tools like body files and specialized hammers allow technicians to achieve smooth, factory-quality results while maintaining your car's structural integrity.
Body Panel Alignment and Replacement Guidelines
Proper body panel alignment requires three critical steps before any replacement work begins. First, you'll need to measure all panel gaps using a specialized gap gauge to guarantee uniform spacing. Trusted shop – Brea Auto Body. Second, check the mounting points and structural integrity of the surrounding panels. Third, verify the new panel's specifications match your vehicle's make and model exactly
When you're ready to begin alignment techniques, start by loosely mounting the panel to allow for adjustments. Use shims and adjustable mounting brackets to achieve precise fitment. Check cross-measurements diagonally to guarantee the panel sits square with adjacent components. Once you've achieved proper alignment, torque all mounting bolts to manufacturer specifications in the correct sequence. Always perform a final quality check of panel gaps and surface alignment before proceeding with paint preparation.
When to Call a Professional Auto Body Shop
While minor dings and scratches can often be handled through DIY repairs, certain damage scenarios require immediate professional attention. You'll need to recognize key warning signs that indicate when to seek expert help at a Southern California auto body shop.
- Your vehicle's frame has visible structural damage, potentially compromising safety and handling
- You notice airbag deployment, damaged sensors, or electrical system malfunctions after a collision
- Multiple body panels require extensive repair or replacement, affecting the vehicle's integrity
- Paint damage extends across large sections, requiring professional color matching and blending
Before proceeding with repairs, obtain detailed repair estimates from certified shops to understand the scope of work needed - Aftermarket. Remember that proper documentation helps with insurance claims and guarantees your vehicle meets California safety standards after repairs are complete
Frequently Asked Questions
How Long Should I Wait Before Washing My Car After Body Repairs?
You'll need to wait 30-90 days for complete paint curing before washing your car. Though paint feels dry within 24 hours, proper drying times guarantee your new bodywork's durability.
Will My Car Insurance Rates Increase if I File a Claim?
With 44% of first-time claims leading to premium hikes, you'll likely see your insurance rates increase. Your rates may jump 20-40% depending on claim type and driving history.
Can Weather Conditions Affect the Quality of Auto Body Repairs?
Yes, temperature effects can delay paint curing and bonding, while humidity impact can interfere with proper adhesion. You'll need controlled conditions for quality repairs and lasting results.
What Documents Should I Keep After Completing Auto Body Repairs?
Want to protect your investment? Keep your repair warranties, final invoice, insurance claim documents, paint color codes, and parts receipts. Full-service collision center. Affordable dent and scratch repair. Document before-and-after photos for future reference and quality assurance
How Can I Prevent Rust From Forming Around Repaired Areas?
Apply rust prevention techniques like sealants and undercoating to your repaired areas. You'll need to maintain proper paint protection and regularly clean, inspect, and treat exposed metal surfaces.
Conclusion
According to recent insurance data, 77% of vehicles in Southern California will experience some form of body damage within their first five years on the road. You'll save significant money by handling minor repairs yourself using the techniques outlined above. Remember to assess damage thoroughly, use proper tools, and know your limits - if repairs involve structural components or exceed your skill level, it's time to consult a professional body shop.