Setting up a local development environment is crucial for building and testing web applications before deploying them to a live server. wmWebStack is a powerful tool that simplifies this process by integrating Apache, PHP, and MySQL into a single package. In this guide, we’ll walk you through the steps to deploy PHP and MySQL on your localhost using wmWebStack, so you can get your development environment up and running quickly.
1. Downloading and Installing wmWebStack
Step 1: Download wmWebStack
- Visit the wmWebStack official website or a trusted source to download the latest version of the software.
- Choose the version compatible with your Windows operating system and click the download link.
Step 2: Run the Installer
- Once the download is complete, locate the installer file (typically named
wmwebstack-setup.exe) in your downloads folder. - Double-click the installer file to start the installation process.
- Follow the on-screen instructions to complete the installation. You may be prompted to choose installation directories and components. The default settings are usually suitable for most users.
2. Configuring Apache, PHP, and MySQL
After installing wmWebStack, you need to configure Apache, PHP, and MySQL to work together seamlessly.
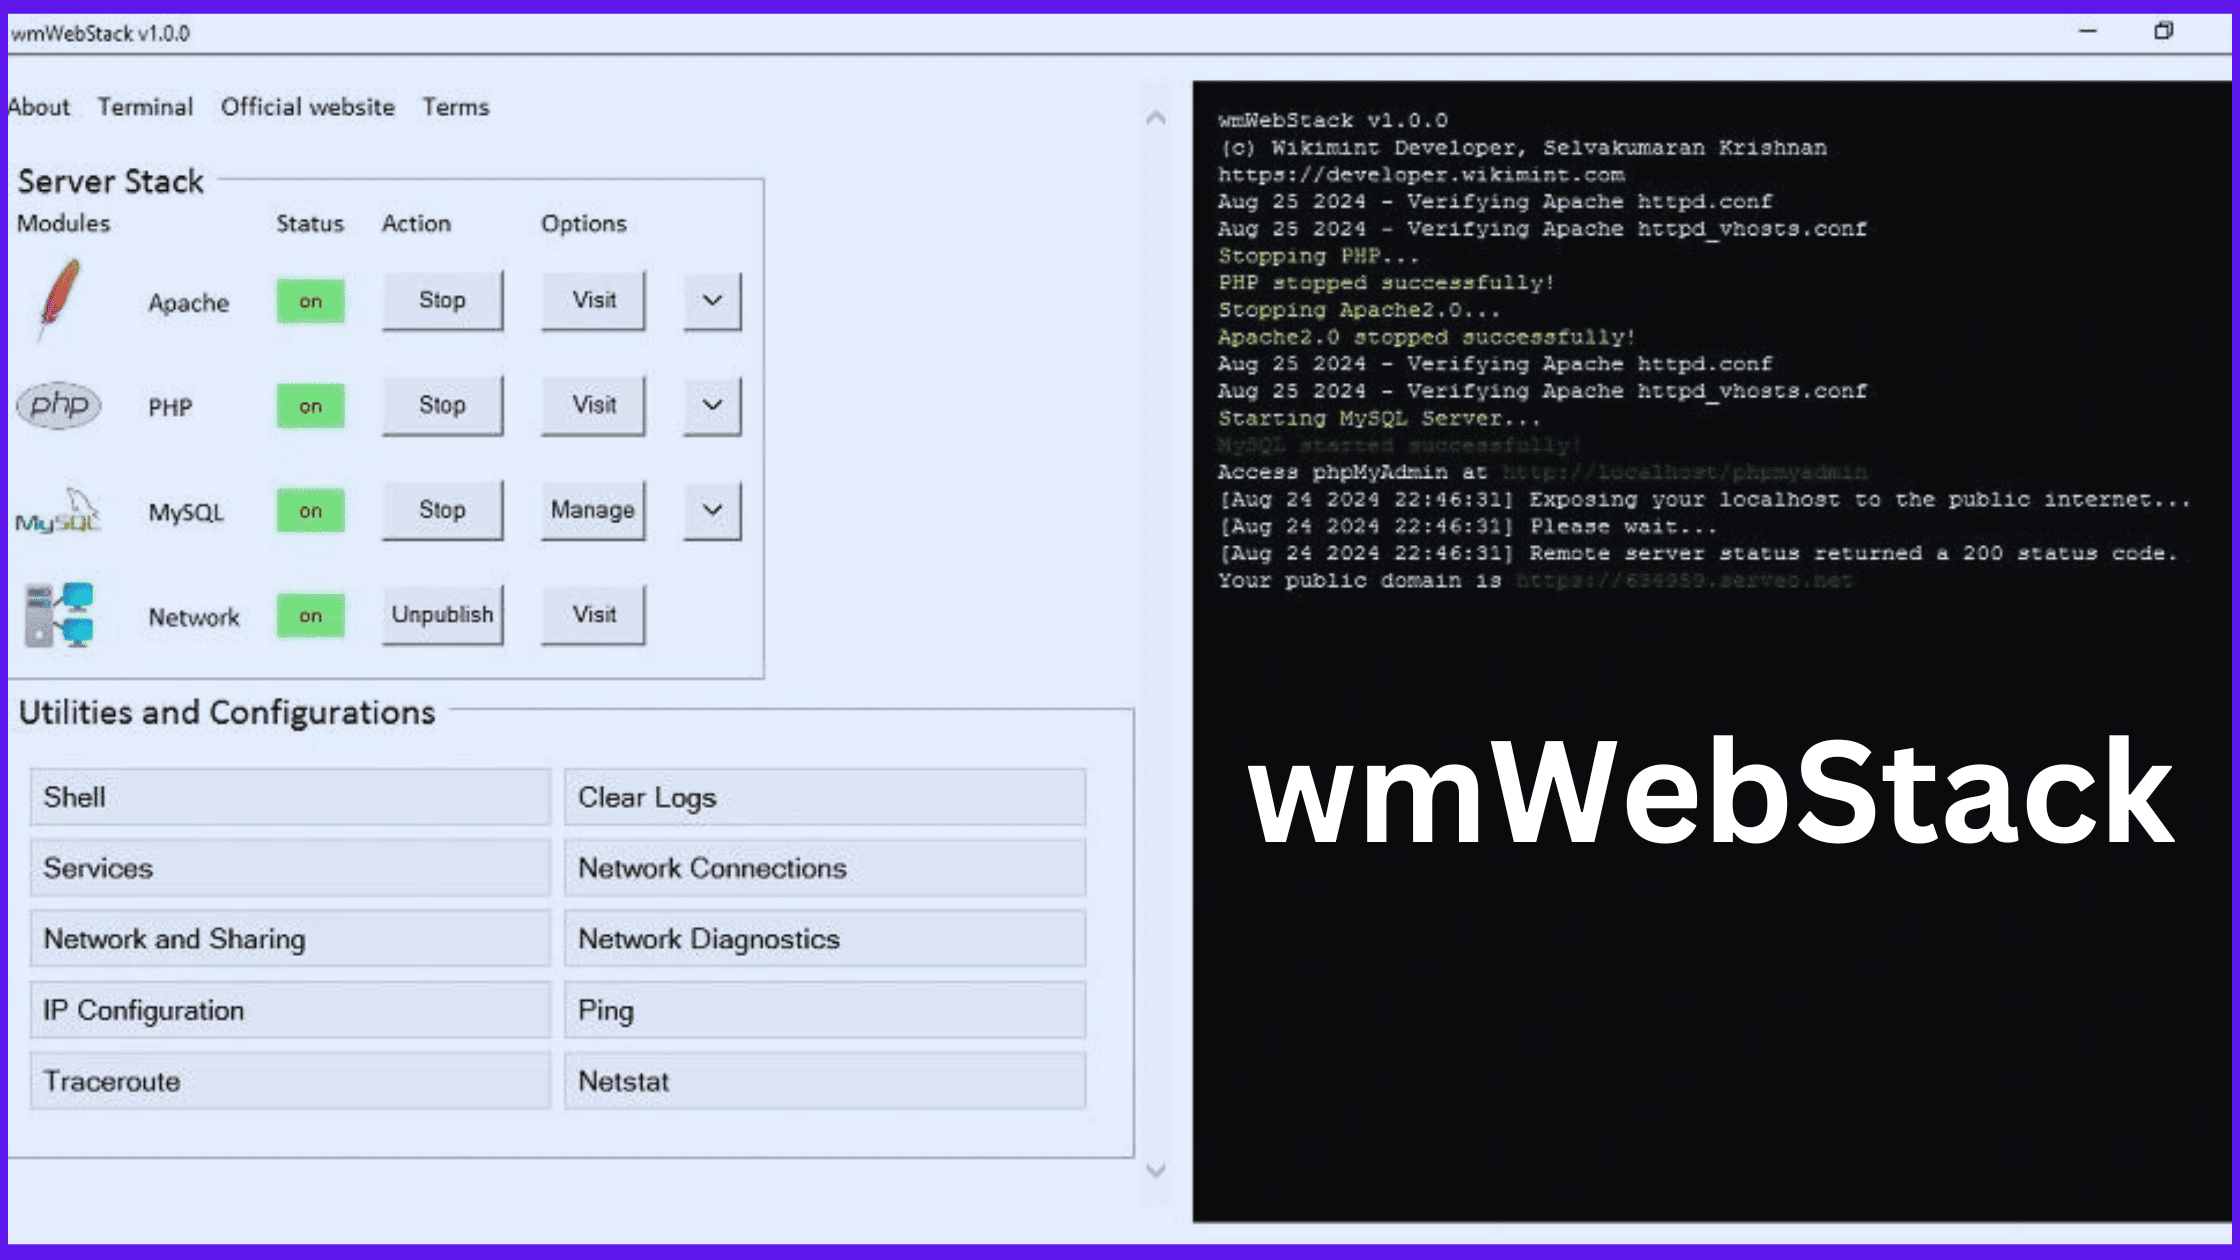
Step 1: Access the wmWebStack Control Panel
- Open wmWebStack by clicking on its desktop icon or searching for it in your Start menu.
- The control panel will display options for managing Apache, PHP, and MySQL services.
Step 2: Configure Apache
- Access Apache Settings: Click on the “Apache” tab in the control panel to access its settings.
- Edit Configuration Files: You can edit Apache’s configuration files (httpd.conf) to adjust settings such as document root or virtual hosts. For most users, the default configuration is sufficient.
- Restart Apache: After making changes, click the “Restart” button to apply the new configuration.
Step 3: Configure PHP
- Access PHP Settings: Click on the “PHP” tab in the control panel.
- Select PHP Version: Choose the PHP version you want to use from the dropdown menu. wmWebStack allows you to switch between multiple PHP versions if needed.
- Edit PHP Configuration: Click on “php.ini” to edit PHP settings. You can adjust parameters such as
max_execution_time,memory_limit, andupload_max_filesizeaccording to your project requirements. - Restart Apache: Click “Restart” to apply the PHP configuration changes.
Step 4: Configure MySQL
- Access MySQL Settings: Click on the “MySQL” tab in the control panel.
- Start MySQL Server: Ensure that the MySQL server is running. If not, click the “Start” button to initiate it.
- Access phpMyAdmin: Click on the “phpMyAdmin” link to open the database management interface in your web browser. This tool will help you create and manage MySQL databases and tables.
3. Deploying PHP Applications
Now that you have configured Apache, PHP, and MySQL, you can start deploying your PHP applications.
Step 1: Create a Project Directory
- Navigate to the Document Root: By default, the document root is usually located at
C:\wmWebStack\www. This is where you will place your PHP files. - Create a New Folder: Inside the
wwwdirectory, create a new folder for your project. For example, you might name itmyproject.
Step 2: Add PHP Files
- Place Your PHP Files: Copy your PHP files into the newly created project folder (
myproject). - Create an Index File: Ensure that you have an
index.phpfile or other entry points in your project folder to test your application.
Step 3: Access Your Application
- Open a Web Browser: Launch your preferred web browser.
- Navigate to Your Localhost: Enter
http://localhost/myprojectin the address bar (replacemyprojectwith the name of your project folder). - Test Your Application: Verify that your PHP application is running correctly. If you encounter any issues, check the Apache and PHP error logs for troubleshooting.
4. Managing MySQL Databases
To work with MySQL databases in your PHP application, follow these steps:
Step 1: Create a New Database
- Open phpMyAdmin: Go to
http://localhost/phpmyadminin your web browser. - Create a Database: Click on the “Databases” tab and enter a name for your new database. Click “Create” to set it up.
Step 2: Create Tables and Import Data
- Select Your Database: Click on the database you just created from the list on the left.
- Create Tables: Use the “SQL” tab to run SQL queries to create tables or import data.
- Manage Data: You can also use phpMyAdmin to insert, update, or delete records in your database.
Step 3: Connect Your PHP Application to the Database
- Edit Database Configuration: In your PHP application, locate the configuration file where database connection details are specified (e.g.,
config.php). - Enter Database Credentials: Provide the database name, username, password, and host (usually
localhost). Save the changes.
Conclusion
Deploying PHP and MySQL on your local host with wmWebStack is a straightforward process thanks to its integrated approach and user-friendly interface. By following the steps outlined above, you can quickly set up a robust local development environment, configure Apache, PHP, and MySQL, and begin working on your web projects efficiently.
wmWebStack’s ease of use and comprehensive feature set make it an excellent choice for both novice and experienced developers. Whether you’re building a new application or testing existing code, wmWebStack provides the tools and flexibility you need to ensure your development environment is optimized for success.