Fake lashes can easily create your own eyes appear larger and even more remarkable without the mess of mascara and for the portion of the rate of lash extensions or lash lifts. Below's every little thing you need to have know about exactly how to use false lashes like a professional.
Just how to Apply Mink Lashes Strips
Action 1: Opt for the ideal eyelash put for your eye shape
While most false lash bits will certainly accommodate all types of eyes, knowing your condition can help you receive the positioning of yours only. If you have monolids, you'll prefer a much shorter set of lashes that's fuller at the outer section to open your eyes up. Typically you'll wish to cut strip lashes and also stack leftovers at the outer edge. Topsy-turvy eyes, or even eyes that are raised higher at the outer section than the interior section, and also downturned eyes (which pitch downward at the outer section) likewise take advantage of even more quantity at the external edge. Consider these types of sets as the cat eyes of false lashes. At acelashes.com, you can easily find cheap mink lashes.
Hooded eyes could be conveniently overloaded through malevolent lashes, so you'll wish long, fluttery lashes focused merely above your student to open your eye at the facility. Individuals or shorter lash strips function properly for this.
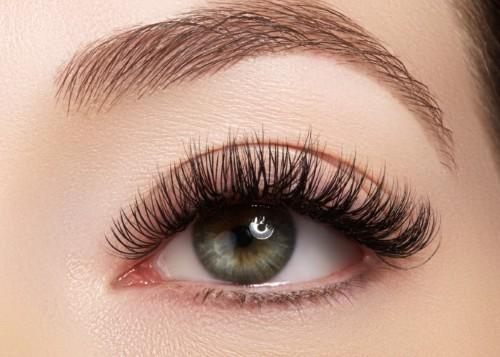
Opt for crinkled lashes that elevate as well as enrich the arc your eye form if you possess rounded eyes. Everything abundant or even as well dense are going to create your eyes look smaller.
Almond eyes are generally the most convenient to position lash bits on, considering that a lot of types work well along with this eye shape. Do not hesitate to experiment as well as view which type you like.
Step 2: Administer eyeliner
No matter which design you start along with, you'll wish to edge your upper lash series along with black eyeliner first to conceal the bottom of your falsies. The moment that is actually established, you're ready to administer them.
Action 3: Remove the lashes from package
In contrast to intuitiveness, it's not an easy as grab and pull. Expert notifies that if you draw the lashes straight coming from the packaging, you take the chance of wrecking the hairs, causing angled lashes or sporadic places on the bit Rather you'll want to carefully spin the band cognizant your fingertips to release the adhesive, starting from the exterior corner in.
Tip 4: Break up the spinal column of the lash bit
To size the lashes as well as to acquire all of them to fit the curve of your lash product line, you'll need soften up the bit initially. When you go to adhesive all of them down, or else you run the risk of the lashes putting up at the interior and outer corners. Professionals trick is to wrap the hair around your hands momentarily, yet you can easily also make use of a make-up comb or a pen. This will definitely help offer the lash strip some extra bend as well as let you assess if it requires to be loosened up further.
You may likewise run your fingernail over the spine like a buckling ribbon to give the bit a lot more bend if the spinal column possesses a tough opportunity remaining wrapped around your finger. Once more, the key listed below is actually to become as mild as possible so you don't by accident damage any one of the private lashes.
Tip 5: Determine the lashes against your eye
Utilizing your hands, remainder the lash bit along your lash series to observe if you'll need to trim it down. The bit should start where most of your natural lashes begin. It'll have trouble staying on and also it can easily aggravate your eyes if it's as well close to the inner corner of your eye. To figure out where they should end, calculate concerning two to 4 lashes internal from the side of your external counter. If there is actually any kind of overhang, it may make your eyes appear droopy. You may acquire best eyelashes from eyelash manufacturer for your necessities.
Measure 6: Prune any extra duration off your lash strip
Making use of a pair of lash scisserses, reduced the back coming from outside-- certainly not the inside. Lashes are actually specifically made along with additional size on the exterior ends, thus do not worry that you'll drop quantity.
Step 7: Use adhesive to the vertebrae
It's easy to overdo it with a chunk of lash glue-- which may acquire around and take for life to dry out-- thus experienced suggests initially putting adhesive in to an unfilled mug and after that using the stem of a cotton bud or the advantage of hairpin to position a slim, also coating of adhesive on the lash spine. Hang around a couple of few seconds to let the glue get ugly on the lash prior to using. And crucial: Do not blow on the adhesive to get it to dry out. You don't yearn for the bacteria coming from your oral cavity to receive anywhere near your eye.
Tip 8: Use tweezers to place the strip along your own lash line
As stated over, you really want the start of the lash bit to line up with where the mass of your all-natural lashes begin. Make use of tweezers to first place the middle of the bit in the facility of your eye, after that nudge the interior and also outer sections down along your lash line. When all the sides are in place, you can easily utilize your hands to carefully pinch your fake lashes and also all-natural lashes together so they're mixed. The objective is be sure there's no space between the lashes and your lash line.