How to Make your possess forty mph quickly electrical bicycle
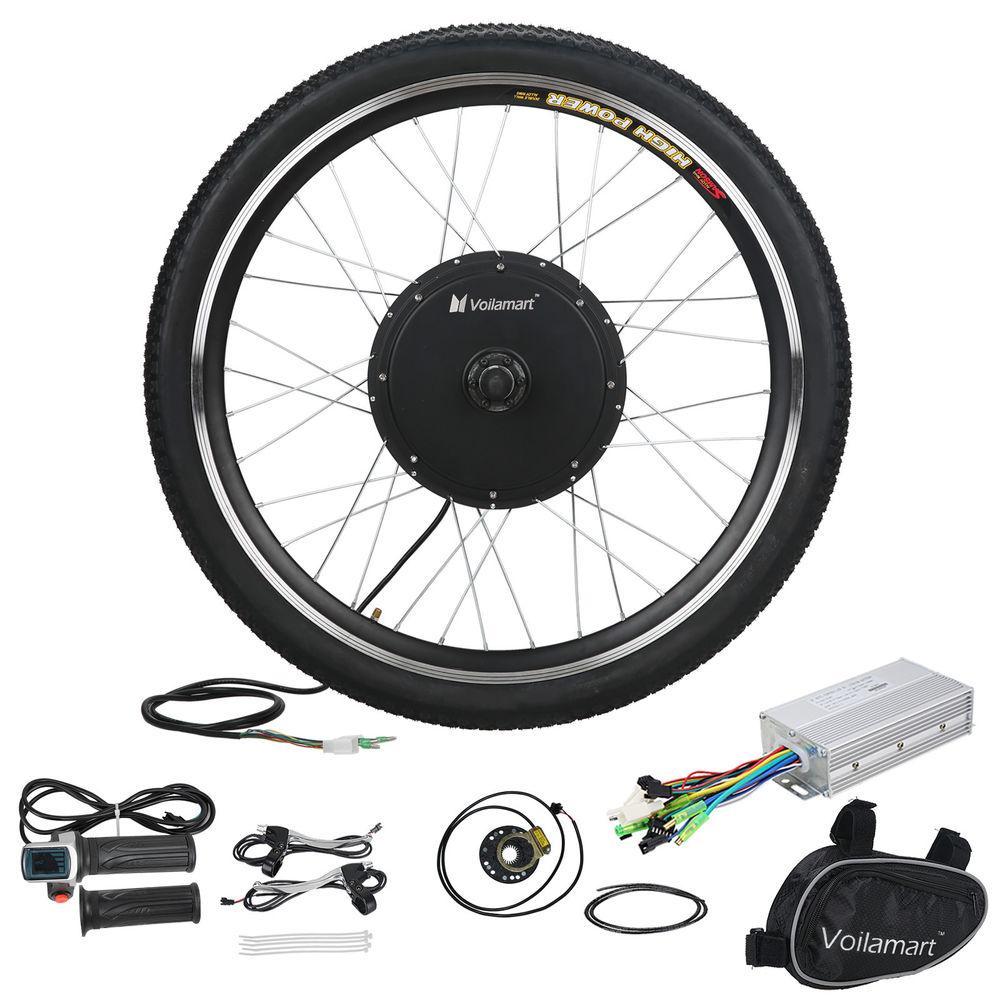
The 1,five hundred W kit I’m using comes with every little thing you need, like the hub motor, controller, throttle, brake levers, pedal aid sensor, equipment freewheel, Cycle Analyst meter, personalized torque arms and a 48V 15 Ah (720 Wh) Samsung battery.
Also, note that I chose the 4T edition of the motor, which is more quickly than the 6T at the cost of a slight torque reduction.
The package is much more pricey than cheap choices on eBay and Amazon, but the variation in quality is important at these speeds and energy ranges. The controller utilizes large performance, minimal warmth mosfets to prevent burning out the controller. The battery employs substantial power cells that will not overheat underneath load. The package even consists of expensive add-ons this kind of as the Cycle Analyst meter (which expenses more than some electrical bike conversion kits by yourself).
It also consists of custom made made torque arms that match the Motobecane Jubilee FS bike. Torque arms are a crucial piece of security equipment at these electricity stages. They maintain the axle of the motor organization and avert the extreme torque from creating the axles to spin in the bike’s dropouts.
Assembling the package
Assembly is truly pretty easy, given that all of the parts have been specifically created to mount to a donor bicycle.
A bicycle stand is beneficial here, but if you do not have one (don’t fret, I don’t either) you can just flip the bicycle upside down.
Begin by removing the rear wheel, then transfer the tire and inner tube more than to your hub motor wheel. Make best electric bike reviews transfer the disc brake rotor as properly. Then put in the freewheel gears by screwing them onto the threads on the motor housing. Do this little by little so you really do not cross thread them.
Then you can area the motor wheel into the rear dropouts. You may have to adjust your disc brake calipers if they don’t line up with your motor. Fortunately, the Motobecane Jubilee FS and the motor from WCEC line up flawlessly, so no changes to the brakes had been necessary.
Now add the torque arms on each and every aspect of the motor. Helpfully, they arrive marked for right and remaining aspect. Then tighten down the axle nuts, securing the motor in spot.
Although the bike is even now upside down, I’d advocate installing the controller beneath the down tube. I place mine just forward of the pedals so it is mainly obscured and difficult to see. Yet again, truly feel cost-free to view the movie over to see a a lot more in depth demonstration of the installation procedure.
Now you can flip the bike back more than so it is standing on its tires once again. At this level, you will want to install the battery. Get rid of the locking plate from the battery and spot it on top of the down tube. Preferably, you’d use the h2o bottle bolts to bolt it to the frame. Even so, on this certain frame, the water bottle bosses are also reduced, so they do not line up with the holes in the mounting plate.
Rather, I drilled two small holes and screwed the plate to the frame.
Rapid engineering observe here for anybody freaking about drilling into their frame: The down tube is a body member that is loaded in rigidity. That signifies that when the bike is in use, that tube is being pulled from the ends. electric bike conversion kit 1000w are not heading to measurably effect the down tube’s load limit in this sort of loading. The frame is also overbuilt here, which is component of the cause why there are previously holes in it for screwing in a water bottle holder. Spherical holes also generate the cheapest anxiety riser. If this frame member was undergoing a bending minute, then generating a pressure riser could be more problematic. Even so, based mostly on the loading orientation and the fact that these bikes are created for this function, drilling a tiny screw gap in this spot is not harmful. Nevertheless, that doesn’t suggest you should go reducing chunks of your frame out. Adhere to two little screw holes.
The 19″ body is large sufficient to suit the battery, but I experienced to remove the shock to get the battery in spot. Once I experienced the battery in, then I could screw the shock back again down. If you selected the 21″ body, you can most likely get the battery in and out without getting to mess with the shock.
Once the battery is in place, you can add the Cycle Analyst meter to the handlebars, and slide the throttle assembly on to the correct handlebar. If you’d like to use the pedal assist sensor, you can also add it to the base bracket. However, given that I prepare on making use of the bicycle much more like a mild electrical motorbike, I just skipped the pedal assist sensor. A throttle is all I need to have, but I can still pedal when I want to assist out.