ARPrice – WordPress pricing table plugin is one of the finest Wordpress plugin available if you want to create a pricing plan comparison table for your product or service.
It provides more than 300+ built-in templates that you can use to design a beautiful pricing table for your business, one of the best features this plugin has is the toggle one.
The toggle feature of this plugin allows you to create a toggle pricing table divided into monthly, yearly, quarterly.
Even you do not have the knowledge of any programming language then also you don’t need to worry about anything because ARPrice provides full graphical drag & drop feature for building a pricing table.
But if you are knowing a little bit about CSS then you would be able to make it little better because it allows you to write custom CSS code for your pricing table.
Today in this article I am going to share a step by step guidelines that how you can create a pricing table and use toggle feature in that pricing table.
What is Toggle Feature in ARPrice – WordPress Pricing Table Plugin
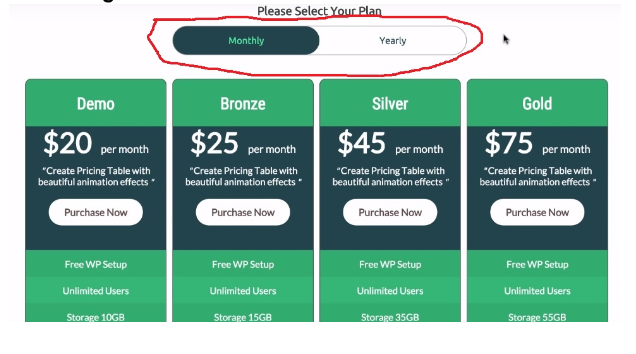
As above in the picture you can see I have highlighted the monthly and yearly box, this what we toggling.
When you will click on monthly it will show you all the pricing plans of a monthly basis and when you click on yearly will show your yearly plans.
So this was the little introduction of toggle feature ARPrice WordPress pricing table plugin.
Now let’s move ahead and create a pricing plan table using a toggle feature.
How to use Toggle Feature in ARPrice WordPress Pricing Table Plugin
So, to create a pricing table using ARPrice pricing table plugin in your WordPress site with a toggle option here I am going to share a few simple steps which you just have to follow and create a table.
Let’s begin…
- Login into your WordPress site, click on the plugin option on the right side of the dashboard.
- Then click on add new and search for ARPrice – Wordpress pricing table, once you find click on install and then activate.
- If you have successfully installed and activated the ARPrice WordPress plugin then go to the right side of the dashboard and click on the ARPrice option. It will take you on the ARPrice dashboard where you will be seeing multiple templates.
- Choose one which you like the most and start applying tons of features given above, here we will use only the toggle one because this article is all about toggle feature but if you want to try others also then you can.
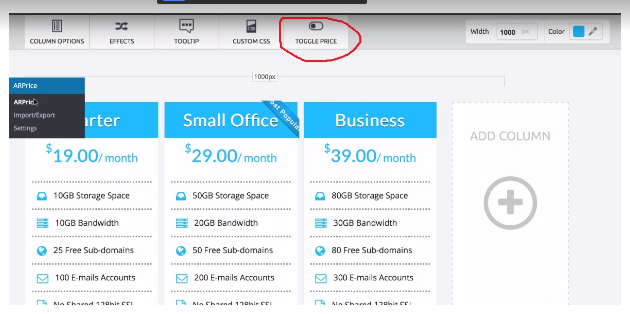
- So, once you selected the template click on toggle option given above as you can see in the picture below.
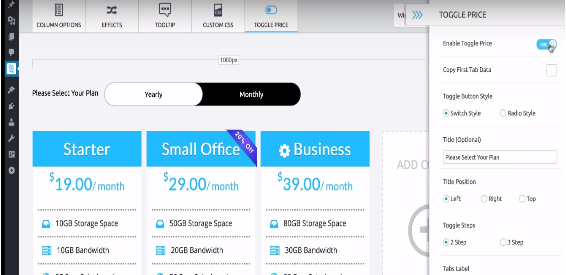
- As you will click on the toggle option n it will take you on another dashboard given below where you just have to click on the enable toggle price option it will start showing toggle option in your pricing table.
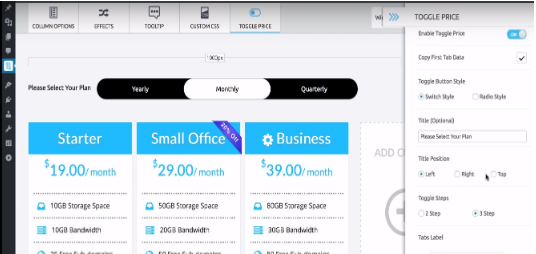
- If you want to add one option in your toggle option then on the left side click on 3 steps under toggle steps and will show you dashboard like this.
- After doing all this just hit the publish button, it will give you shortcode and wherever on your site you will put this shortcode pricing table, will start showing.
Conclusion:
Let’s wrap up…
Above we have discussed one of the most important features of ARPrice and also we have seen step by step that how you can create a pricing table and apply toggle option on it.