7 Easy Facts About Digitalization Of 8mm Film Explained
The wetgate process means the film is coated with a liquid which has an index of refraction matching that of the plastic; this liquid completes the valley formed by a scratch, and the film emulsion can then be captured effectively. It might sounds like hokum, but it truly works.
In general, quality expenses money. Actual time transfer will be the least expensive, frame-by-frame capture more costly, and film scanning will be more expensive yet. There is a big variation in pricing, and the cost per foot drops if you have a large order. However, to provide you some estimate, real time capture can be $4-$8 for a 50 foot reel of 8mm movie; older scanning equipment can run $15-$25 for a 50 foot reel.
In addition to the cost of the transfer, normally based upon the number of feet of film, there are often other charges. There can be preparation charge to repair bad splices or bad leaders. The greater end transfer equipment is extremely pricey to operate and they don't wish to lose a great deal of time tampering 50 ft.
Rather, all of your reels get joined together on a single 400 ft. reel which can then be effectively processed on the costly scanning equipment. There can be a charge for cleaning up the movie, and a charge for transferring the result onto DVD, tape, or disk drive. Capturing sound movies is more costly than silent films. Due to the volume of movies processed, the cost was a https://www.washingtonpost.com/newssearch/?query=slides to digital very sensible $15 per 50 ft. reel, plus some other sensible overhead expenses. In overall it was about $700, but, as you'll see, it was well worth it. Cinepost utilizes Cintel movie scanners with some custom hardware that allows them to deal with 8mm movie.
Some Known Questions About 8mm Film Transfers.
I do not have a lot of experience, in reality, just 2 information points. However I wanted to share what I returned from the mommy & pop video service I used (frame-by-frame capture) vs. when I went to an expert telecine service (Cinepost). Or to put it another way, what does 15 cents/ foot processing give you vs.
These are the corresponding frames of the same film from the 2 captures. Note that positioning isn't precisely the very same. Keep in mind too that I had asked both to do a wide capture including the gear holes; normally they crop the video so the gear hole doesn't show up. I prefer to the cropping myself.
Usually, Cinepost would return much better looking results than this. The most obvious difference vs. the cheap capture is that, even in this raw state, the colors are far more natural. Look too how to transfer 8mm film to digital at home at the brilliant reflection off the stroller handle on the ideal edge of the frame: the less expensive capture bleeds brightness into the location beside the handle.
Look at the yellow and green chairs at the top of the frame: the image is much crisper; this appears too in the wires of the wire mesh fence. There is something else that is instructional in this capture. Take a look at the color of the light coming through the sprocket holes on the left side of the frame.
Transfer 8mm Film To Digital Fundamentals Explained
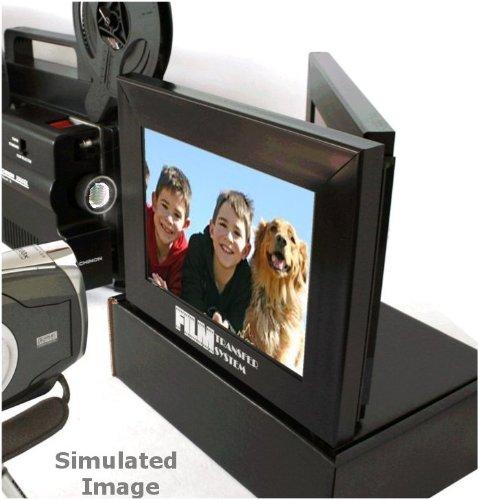
Many people receive records like the first one shown on a DVD; that is that and they just deal with the bad quality. Much can be done to enhance the quality in post processing, but it is always best to begin with the very best capture you can. First I attempted a piece of software application named v Expose, made by a business called Movement DSP.
v Reveal is a customer variation of it, but with many fewer knobs, at a really reasonable cost point (US$ 39 since January, 2011). There are just a few knobs for managing what algorithms are used to the image, such as motion stabilization, contrast adjustment, fill lighting, sharpening, etc. What it does do, though, it usually does well.
https://www.youtube.com/embed/EaN57vR1p4M
Here is a very same Cinepost-captured frame as above after v Reveal has enhanced it: Among the things v Reveal does not do is enable changing the settings throughout a film. This can be worked around by chopping a movie into one small video per https://en.search.wordpress.com/?src=organic&q=slides to digital scene, then tweaking the settings for each scene, and pasting the results back together, however that would be more than tedious.
I most likely could have used v Expose on my films and been done rapidly. However, I like to tinker, so I took a different technique, one occupied with pitfalls and laden with disappointment. Avisynth is an open source software that runs only under Microsoft Windows. It has no commercial support, advancement advances in fits and starts, and despite a healthy user community, you will need to determine a lot of things through trial and error.
The Greatest Guide To Diy 8mm Film Transfers
Inside are streams of data for video and audio, each of which need to be decoded utilizing the codec particular to that stream type. The information is processed by the codec and fed back to the application as a raw stream of pixels or audio samples, which are then shown or what have you.
Conventionally, avisynth files have a suffix of ". AVS". Existing video for windows-aware applications can open.avs files and display the video. The unusual thing is that.avs files do not include any video! Rather, they are scripts that describe how to produce video. When an application opens the file and requests for frame 0, the avisynth chauffeur checks out the script, determines how to create frame zero, then feeds the deciphered video to the application, which thinks the video 8mm film australia had actually merely been read from a file.
film="myvideo.avi" src = avisource(film). Convert To RGB 32(). crop(100,100,400,300) scenes = src.trim(622,894) ++ src.trim(100,434) smaller = scenes. Lanczos 4Resize(320,240) better = smaller.tweak(brilliant=30, sat=1.2, cont=1.1) brighter This (untried) script opens the file named "myvideo.avi", converts it to a 32-bit RGB pixel format, and chooses a 400x 300 square of pixels from each frame balanced out from the top by 100 pixels and the left by 100 pixels.
Notification that the order of the scenes has been reversed from the convert old 8mm film to digital original. Avisynth is a non-linear editor, implying it isn't constrained to process frames in the order they appear in the file. These 2 scenes are then resized to be 320x 240 pixels, its brightness is enhanced by 30 units, color saturation is boosted by 20%, and the contrast is improved by 10%.
Transferring 8mm Film To Digital Additional resources for Beginners
There are many methods to write this script, as the syntax is rather versatile. One of the strengths of avisynth is that it has an open architecture where new filters (processing algorithms) can be produced by zanepjdp757.image-perth.org/12-companies-leading-the-way-in-costco-8mm-film-transfer-review anybody and plugged into the avisynth structure as effortlessly as if they had belonged to the original program.