为了帮助教育网的同学翻墙, 如果你是使用教育网ipv6的用户,请先测试你的网络确认.
测试地址: ![]() h ttp://www. ipv6. org
h ttp://www. ipv6. org
如果出现如下的页面(红色框内的),那就说明你是IPV6了,请留言跟帖,我将稍候篇写 ipv6网络下的翻墙教程!,请留意此帖!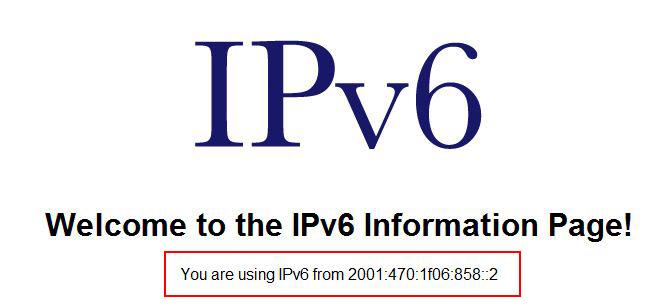
感谢 @zzzcn @_windywinter
首先介绍基本的 IPv6 协议安装方法, 以及实现常用接入方法的语句:
对于Windows XP用户:
开始-CMD
安装ipv6的语句:
netsh int ipv6 install
对于Windows XP/2003/Vista/7用户:
禁用6to4:
netsh int ipv6 6to4 set state disabled
设置IPv6 DNS服务器:
netsh int ipv6 add dns "本地连接" <DNS服务器地址>
双栈/原生IPv6接入:
无需特别设置
ISATAP隧道设置:
netsh interface ipv6 isatap set state disabled
netsh interface ipv6 isatap set router <ISATAP隧道服务器地址>
netsh interface ipv6 isatap set state enabled
固定IP设置:
netsh interface ipv6 add address "本地连接" <固定IP地址>;
netsh interface ipv6 add route ::/0 "本地连接" <网关地址> publish=yes
Tunnel Broker设置:
访问注册账户,记下获得的ipv6地址,并启用(enable)通道
然后在本机:
ipv6 ifcr v6v4 <本机IPv4地址> <Tunnel Broker地址>
ipv6 adu 5/<获得的IPv6地址>
ipv6 rtu 2000::/3 5
其中:数字5是在执行“ipv6 ifcr v6v4 <本机IPv4地址> ” 时,系统生成的接口 index编号。
注意:Windows XP重启后上述配置参数不会保存,所以用户需要重新配置。
对于Linux用户:
ISATAP隧道设置(Ubuntu/Debian):
sudo apt-get install isatapd
sudo isatapd -r <ISATAP隧道服务器地址>
Tunnel Broker设置:
iptunnel add sit1 mode sit remote <Tunnel Broker地址> local <本机IPv4地址> ttl 30 //sit1是属于tunnel的那个接口,可随便设,
但不能用sit0ifconfig sit1 up
ifconfig sit1 inet6 add <获得的IPv6地址>/128
route -A inet6 add 2000::/3 sit1
echo 1 > /proc/sys/net/ipv6/conf/all/forwarding
学校没有提供ipv6-enabled dns的,可以试试这个dns: 2607:fcd0:1337:4b::2
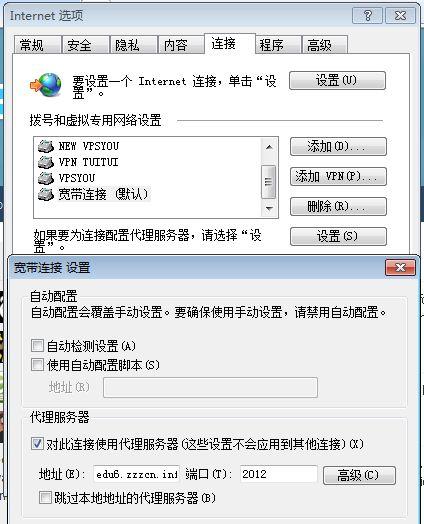
最新IPV6代理服务器 edu6.zzzcn.info 端口:2012 如图: